


Connect OpenCode to Chatway using the Chatway MCP (Model Context Protocol) integration. This allows OpenCode to access your Chatway conversations, customer information, and support data based on the permissions you give it. This guide shows you how to connect OpenCode to Chatway using MCP.
Once connected, you can ask OpenCode to find and review customer conversations, look up customer details, summarize support activity, and identify recurring issues or customer feedback. Depending on the permissions you give it, OpenCode can also take actions in Chatway, such as sending replies, assigning or resolving conversations, and adding notes or tags.
For example, you can ask it to review recent conversations, identify customers who are still waiting for a response, and summarize the issues that need your team’s attention.
For automatic real-time replies to incoming customer messages, connect Chatway webhooks to your AI agent and use the Chatway API to send responses. Chatway MCP can be used alongside this workflow to access Chatway tools and data.
Chatway’s MCP integration is available on all Chatway plans, including the Free plan.
Requirements
Before you connect OpenCode to Chatway, ensure you have:
- OpenCode installed on your device.
- A Chatway account with an Owner or Admin role.
Step 1: From your Chatway dashboard, go to “AI agents” and access the External AI tab.
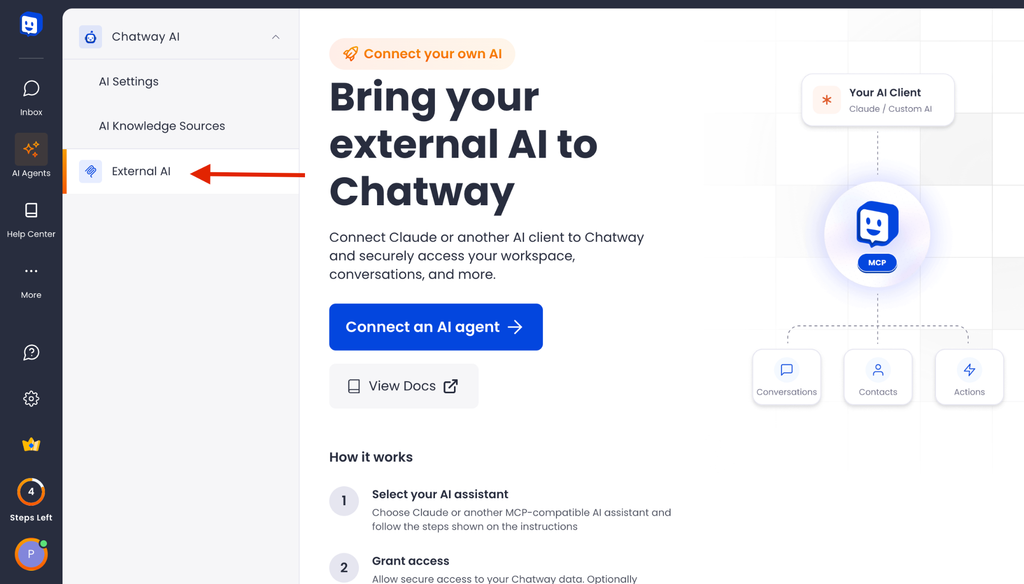
Step 2: Click on the “Connect an AI agent” button and select OpenCode.
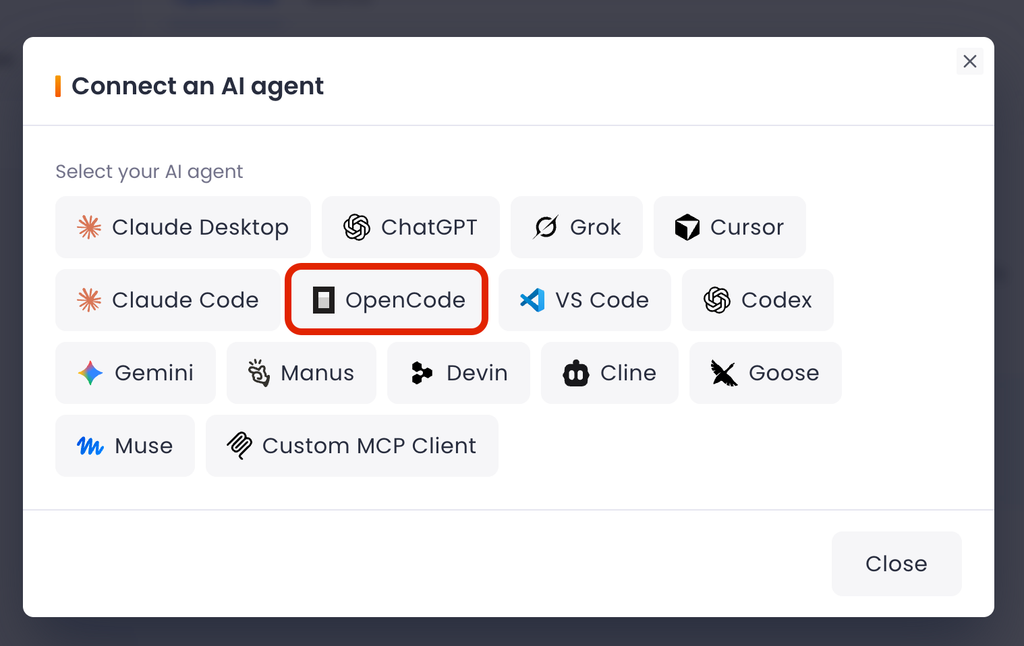
Here, you’ll see the list of steps to connect the OpenCode MCP with Chatway.
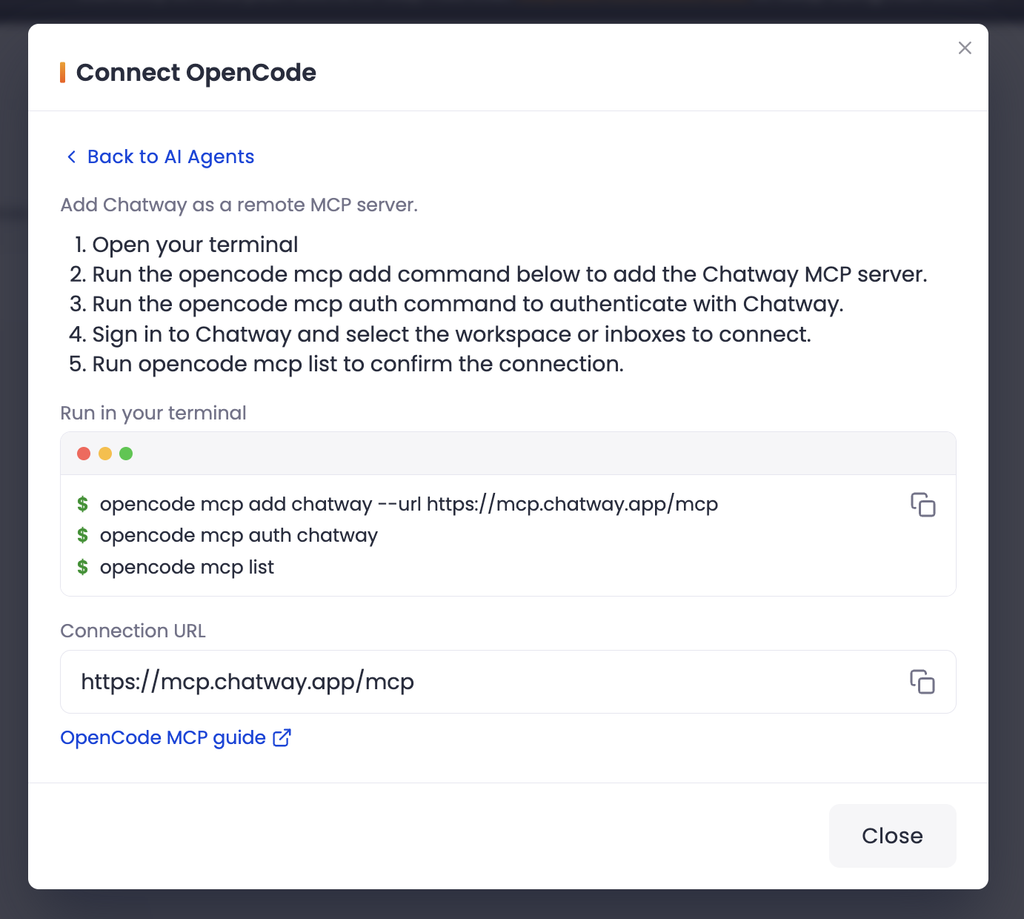
Connecting Chatway to OpenCode
Follow these steps to add Chatway as a custom MCP server in OpenCode.
Step 1: Open your terminal and type the following command. Please ensure that you have OpenCode already installed.
opencode mcp add chatway --url https://mcp.chatway.app/mcpOnce successful, OpenCode saves the Chatway connection in its global configuration, so you can use it across your projects.
Step 2: Next, type the command “opencode mcp auth chatway” in your terminal. This will open the Chatway authorization flow in your browser.
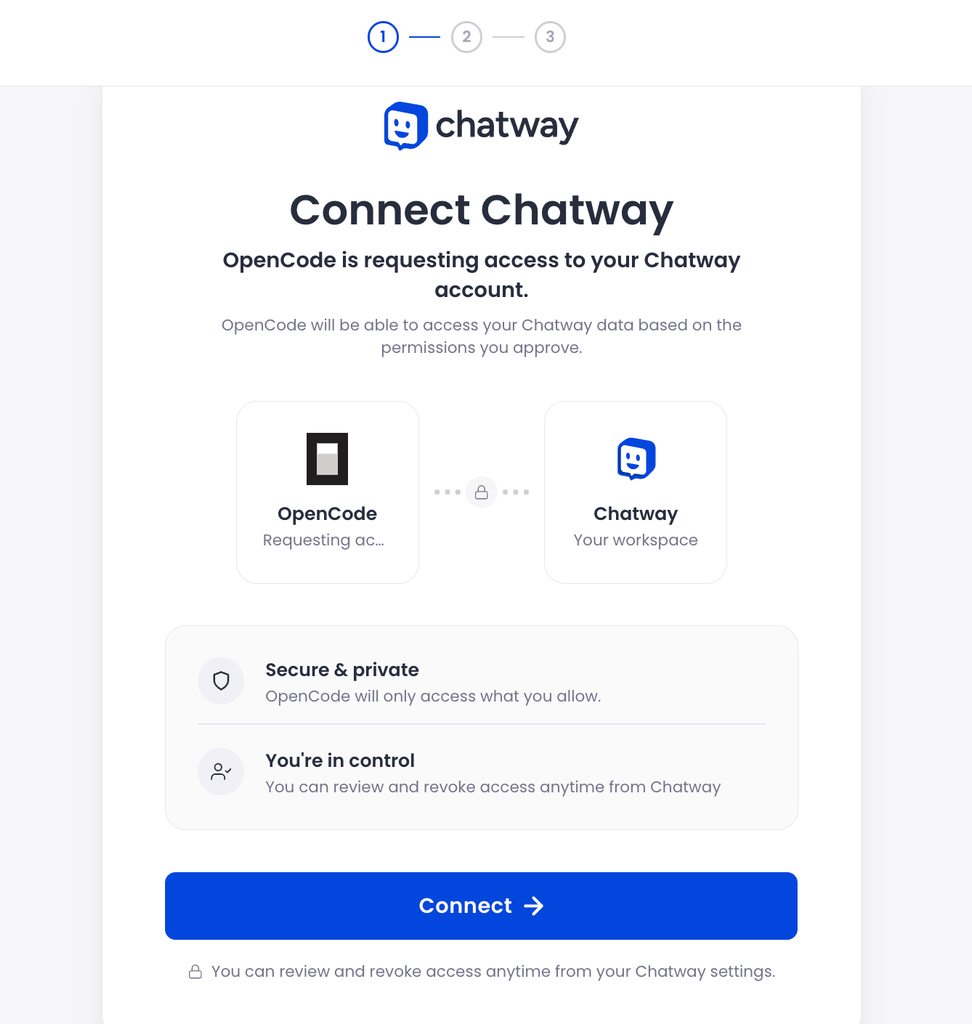
Click on the “Connect” button here.
Step 3: You can select the widgets and channels in your Chatway account that you want OpenCode to access.
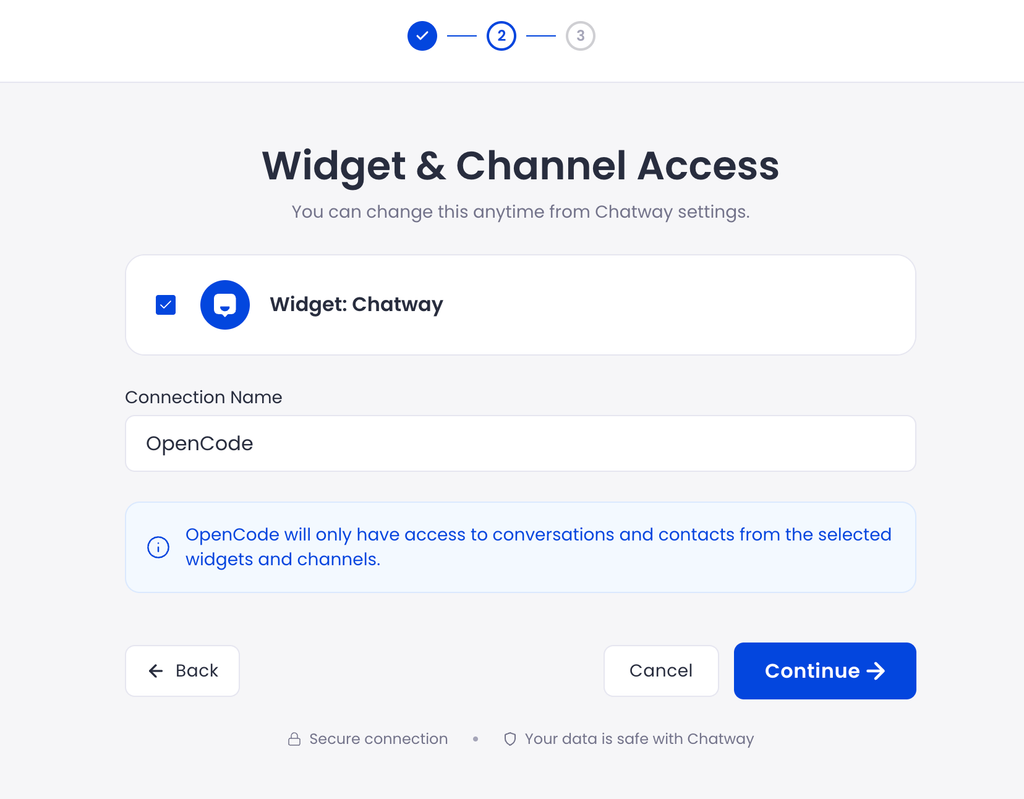
Click on “Continue” once done.
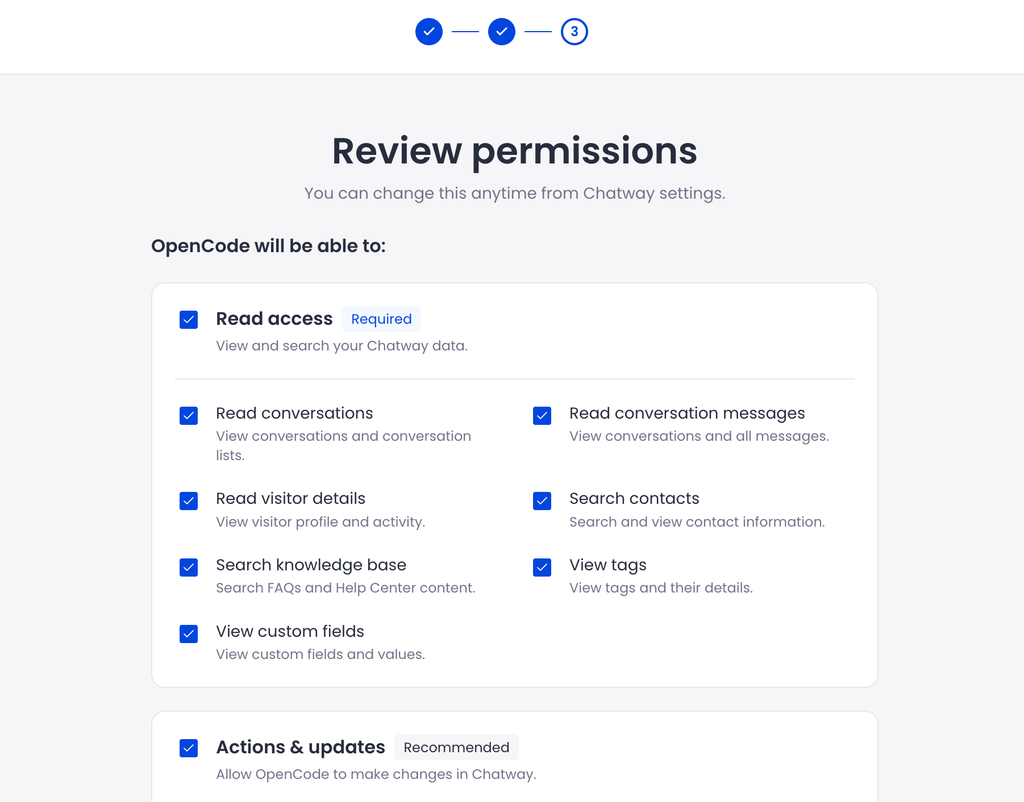
Step 4: You can also review the permissions you want to give OpenCode. You can always edit these later from the “External AI” section in Chatway.
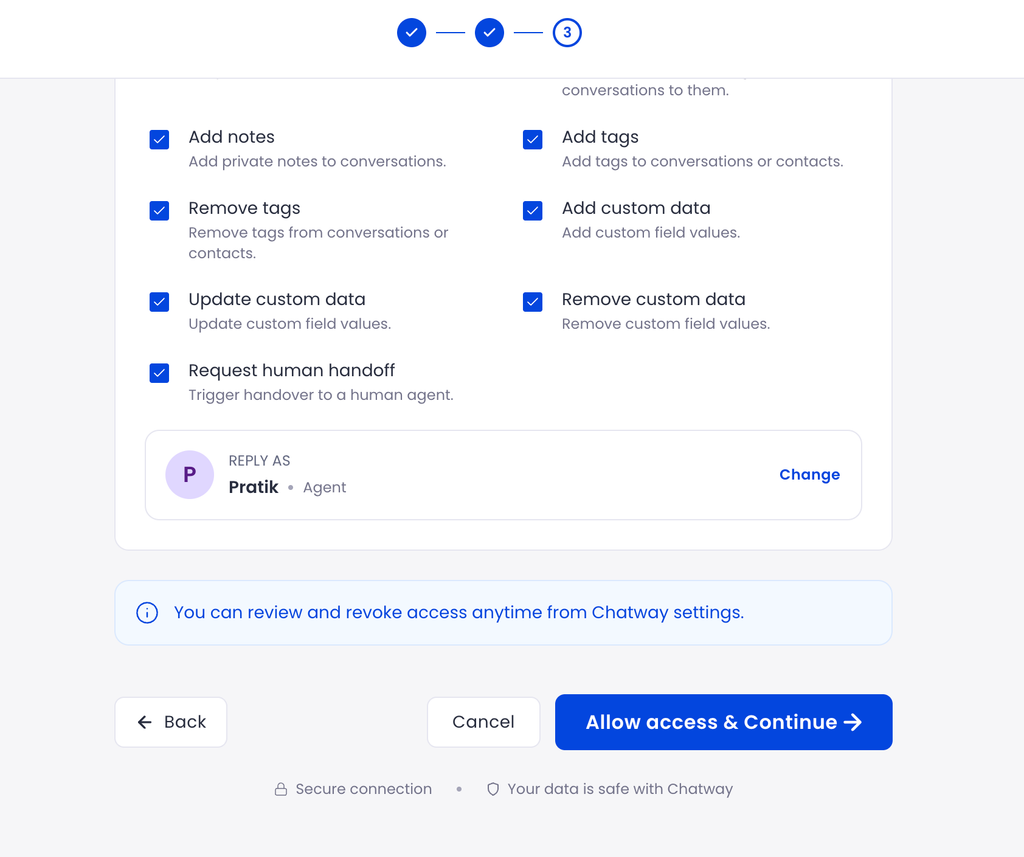
Step 5: Once this is done, click on the “Allow access & continue” button here.
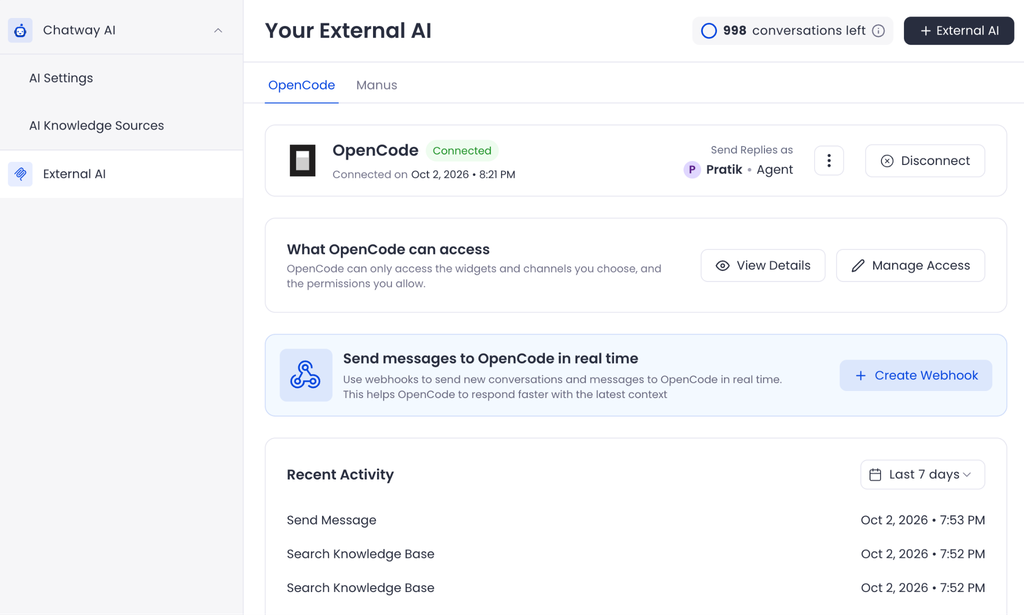
Once connected, this is how the OpenCode MCP will look like in your Chatway dashboard.
After completing the authorization process, run the following command in your terminal to check your MCP server configuration:
opencode mcp listOpenCode should show “chatway connected”. This confirms that OpenCode has registered the Chatway MCP server.
Start using Chatway with OpenCode
Once you connect OpenCode, you can use it to find information, review conversations, and perform actions in your Chatway workspace.
You can do this by accessing your OpenCode app (typing opencode) in your terminal. Here are some examples:
Example 1: You can ask OpenCode to find conversations where customers are still waiting for a response. As an example, we used this prompt:
Can you please identify Chatway visitors who are still waiting for a reply?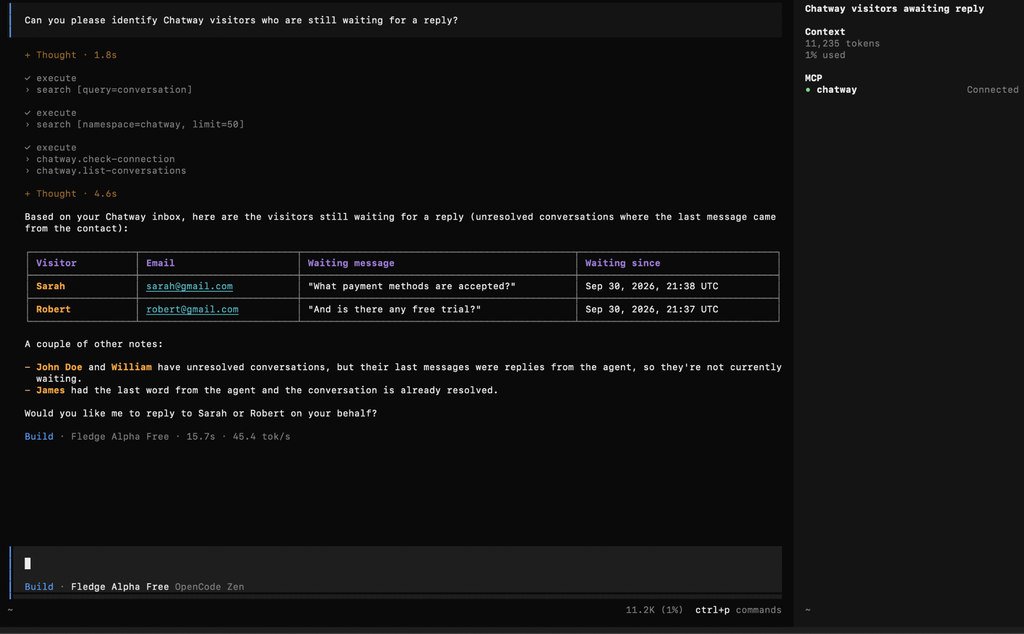
OpenCode can then return a list of matching conversations and summarize the questions that need your team’s attention. The results will depend on the conversations and data available in your Chatway workspace.
Example 2: In the next example, we asked OpenCode to send a message to a customer inquiring about the free trial. We used the following prompt:
Can you please respond to Robert with the relevant answer regarding Chatway’s free trial plan?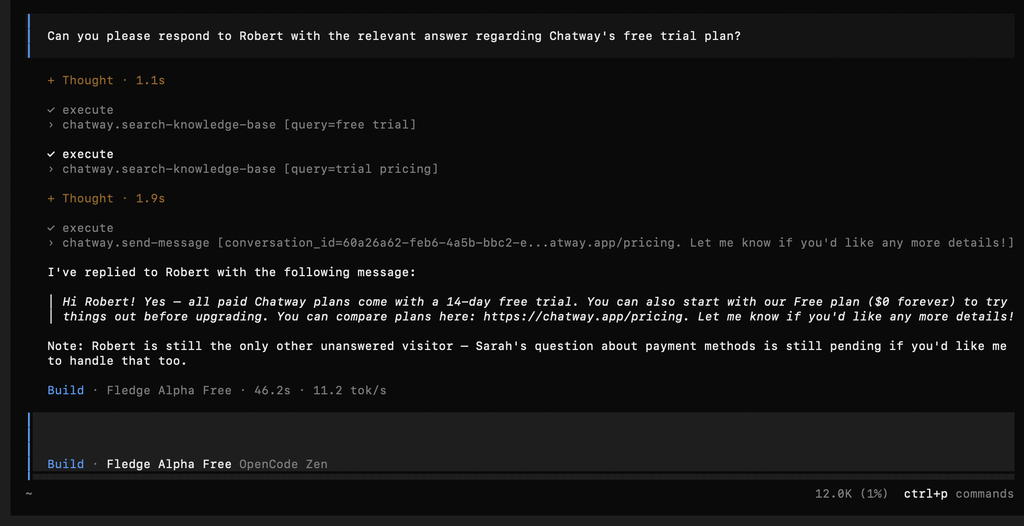
In this example, we asked OpenCode to send a reply directly to the customer. However, you can also ask it to draft a reply for you to review before sending it. For example, add “Draft the reply for me to review, but do not send it yet” to your prompt.
Note: The prompt and results may vary depending on the data in your Chatway account. This is just an example used for this guide.
Once you’re happy with it, ask OpenCode to send the approved reply to Robert through Chatway. As you can see here in the Chatway inbox, the OpenCode MCP responded to the customer “Robert” with the relevant information:
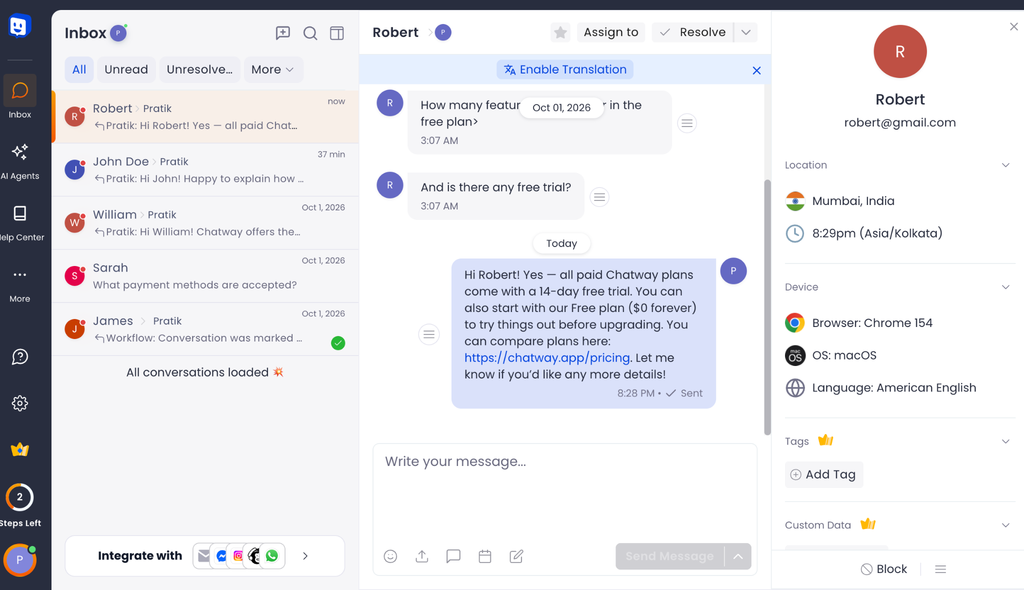
Note: In Chatway’s External AI settings, the Send Replies as option determines the sender identity used for replies sent by your external AI agent. Check this setting so you know how your replies will appear to customers.
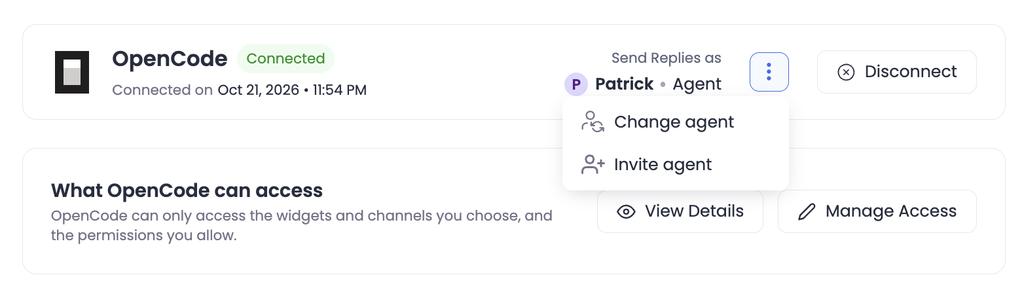
The “External AI” section in Chatway will show you all the recent activity made by your OpenCode MCP.
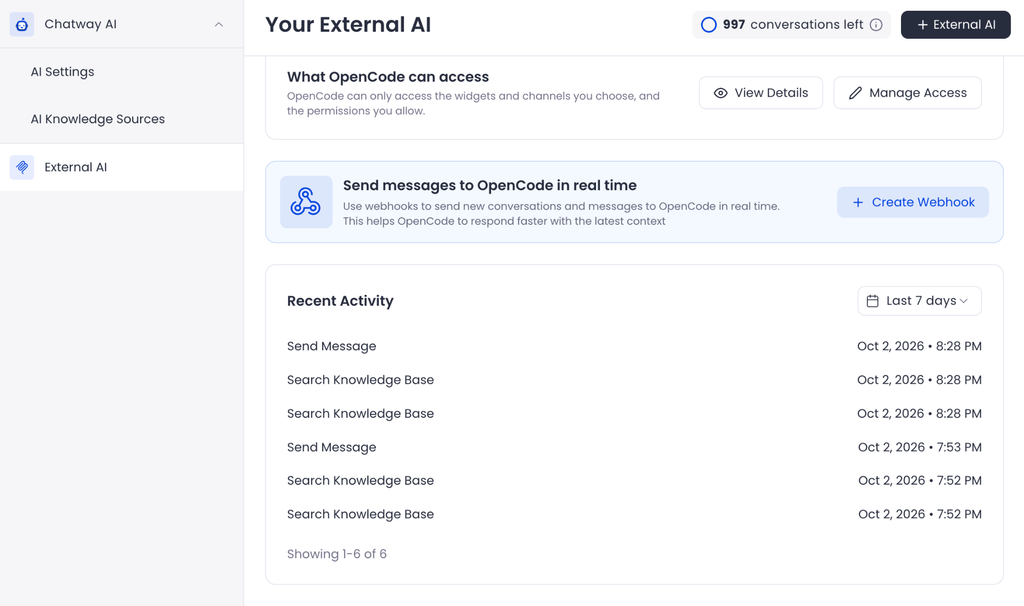
Here, you can disconnect your external AI. You can always manage the read and write access of the OpenCode MCP from the “Manage Access” section.
You can also use webhooks to let Chatway send conversation events to your AI agent in real time.
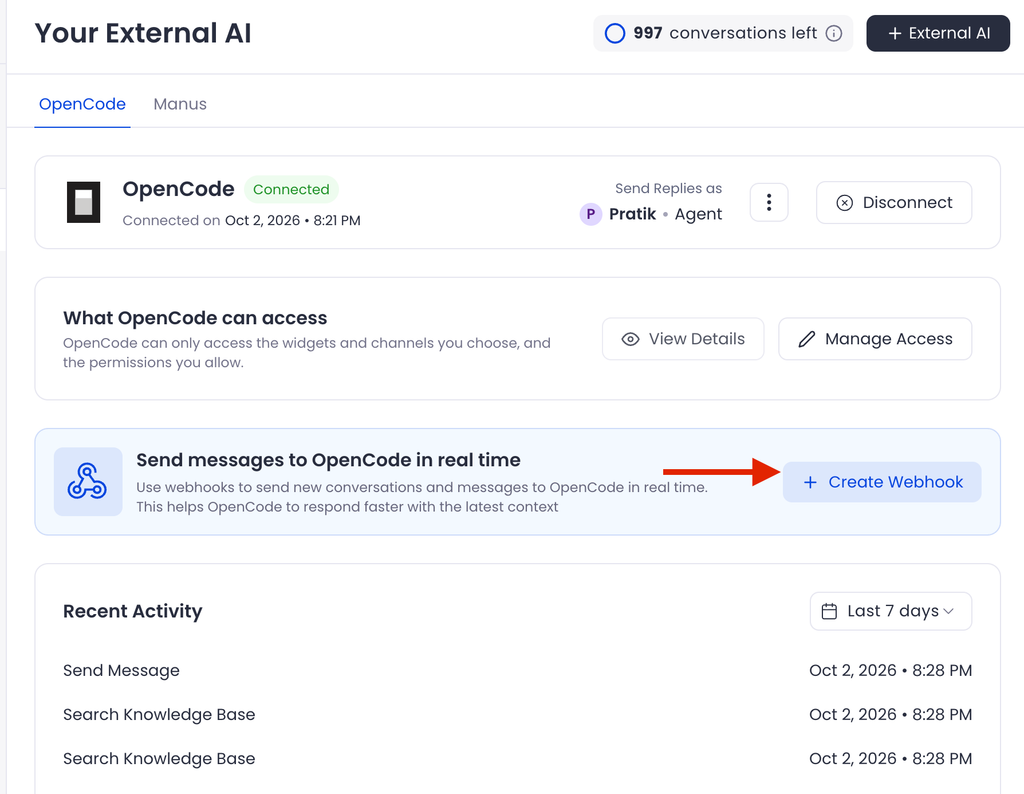
To learn how to set up webhooks in Chatway, you can check the following guide here.