


This guide will show you how to connect Chatway MCP (Model Context Protocol) with Grok, allowing Grok to securely access your Chatway tools and data through an MCP connection.
Once connected, Grok can work with your Chatway customer support conversations and data based on the permissions you provide. You can use Grok to find and review conversations, access relevant customer information, work with your support knowledge, and perform supported actions in Chatway.
For automatic real-time replies to incoming customer messages, connect Chatway webhooks to your AI agent and use the Chatway API to send responses. Chatway MCP can be used alongside this workflow to access Chatway tools and data.
Chatway MCP can also be used with Grok to review and summarize support information, identify recurring customer issues, and uncover useful patterns from your conversations and customer data.
Chatway’s MCP integration is available on all Chatway plans, including the Free plan.
Requirements
Before connecting Chatway MCP to Grok, make sure you have:
- A Grok account with access to MCP integrations
- Your Chatway MCP connection details, which we’ll obtain in the steps below. You must have an Owner or Admin role in your Chatway account to authorize the MCP connection with Grok.
Grok Business and Enterprise: Your team administrator must first enable the custom MCP connector through the xAI console under Grok Business → Connectors. If you cannot create or access the connector, contact your administrator to verify your permissions.
The exact location of MCP settings may vary depending on the Grok interface and the plan you’re using.
Obtain the Chatway MCP Connection Details
First, let’s obtain the Chatway MCP connection details you’ll need to connect Chatway with Grok. Please follow the steps below.
Step 1: Log in to your Chatway account and open the AI settings page by clicking on AI Agents or by visiting this link directly: https://go.chatway.app/ai-settings
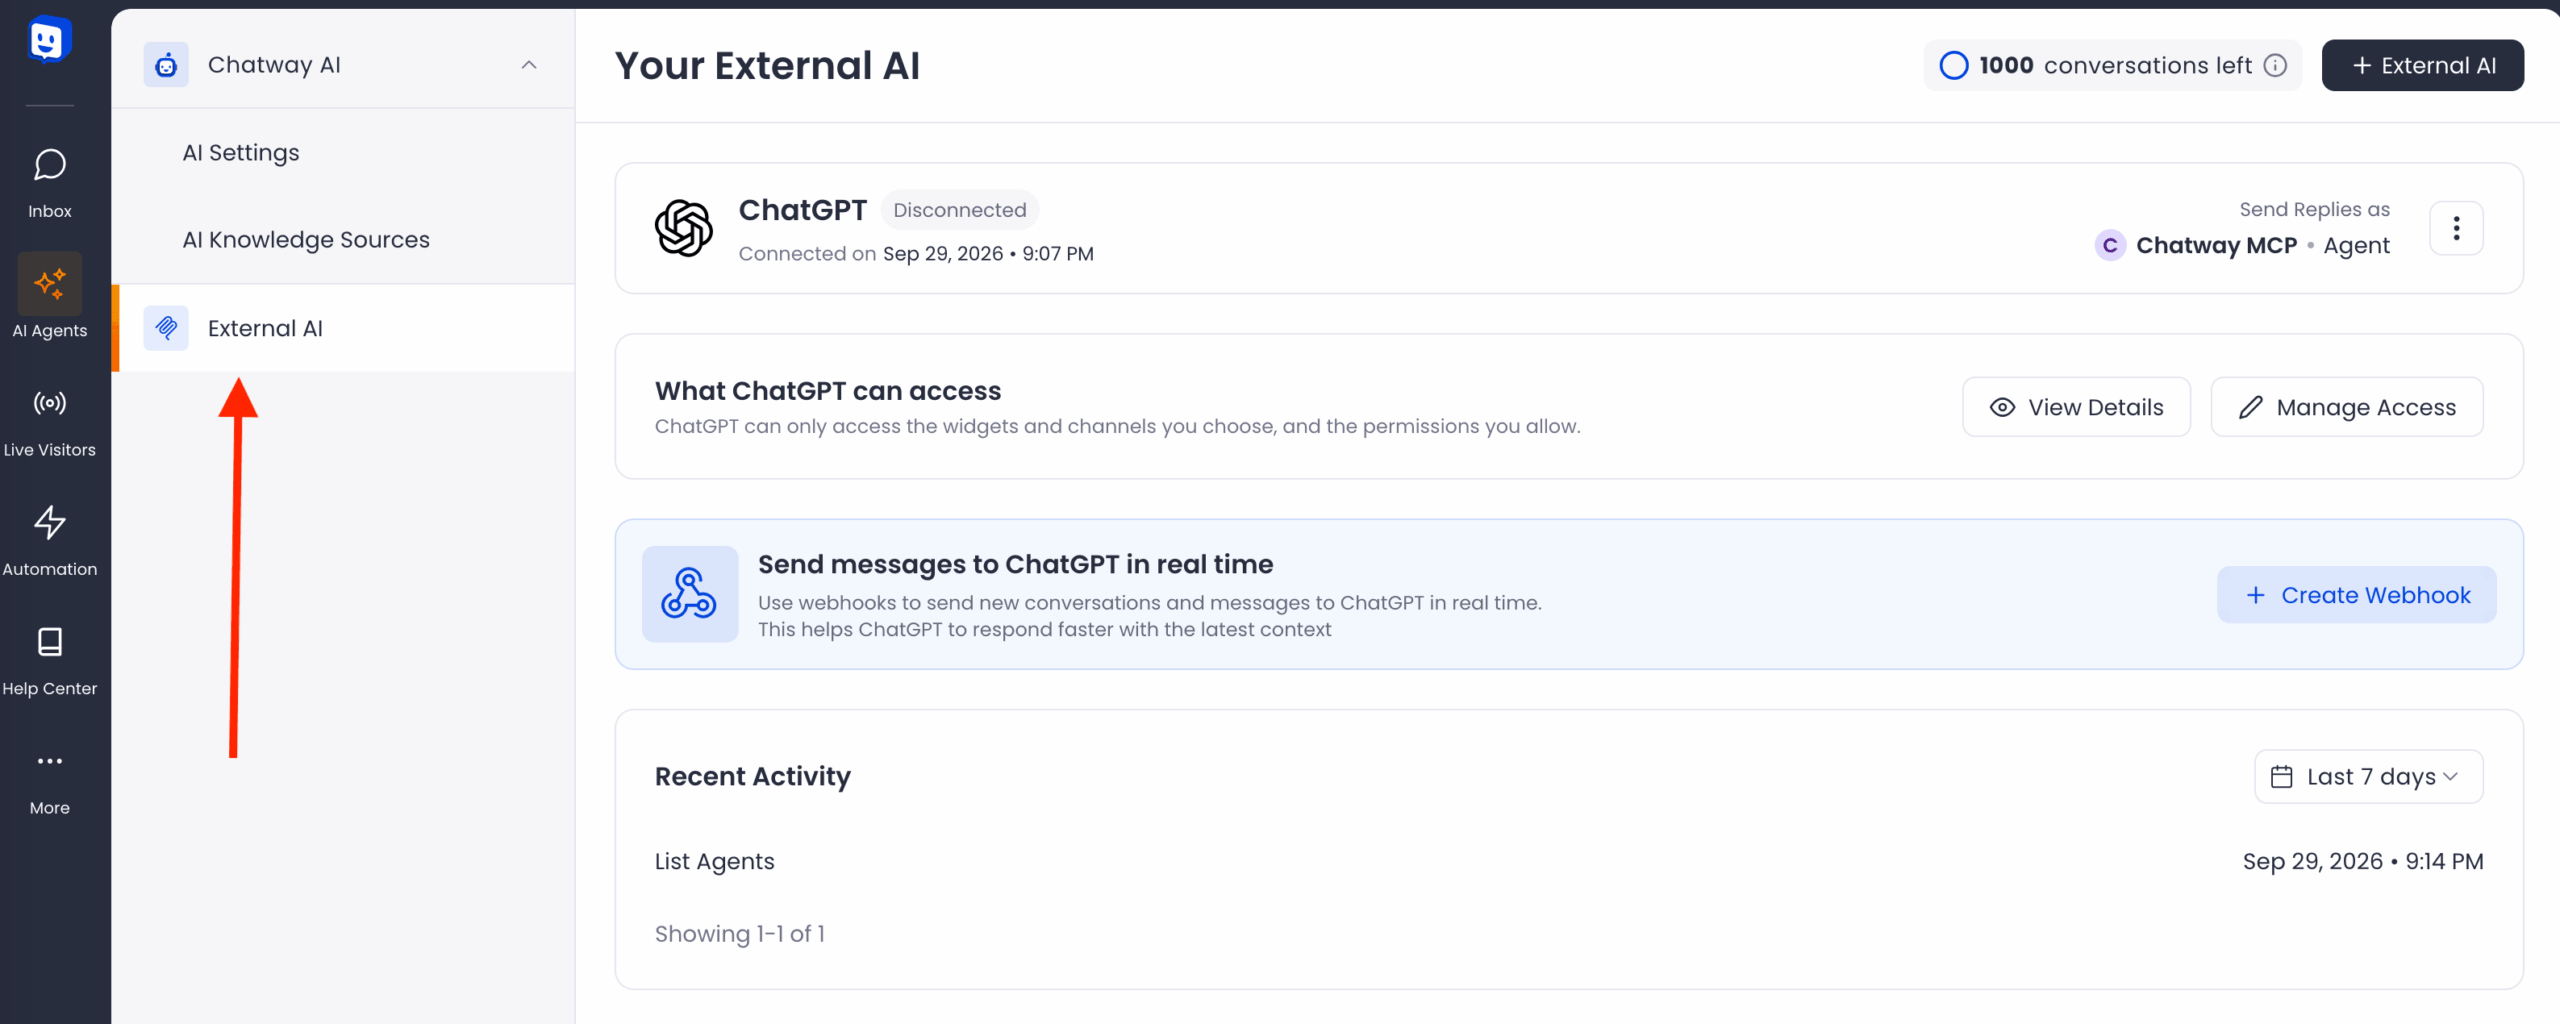
Step 2: Go to the External AI page from the navigation on the left:
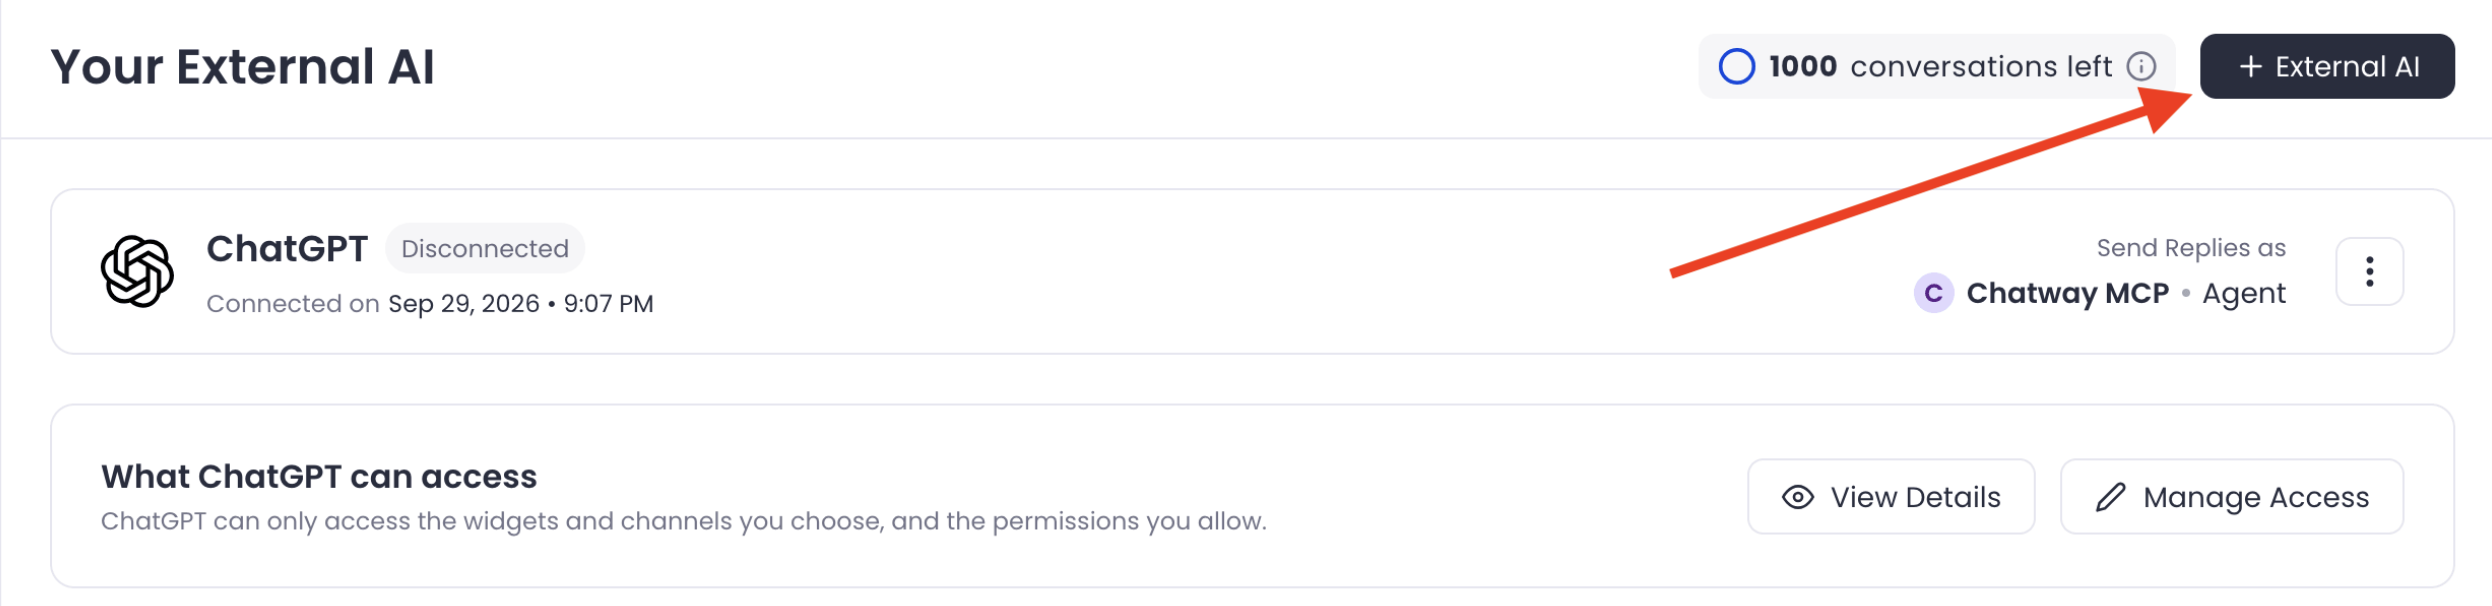
Step 3: Click Connect an AI agent:
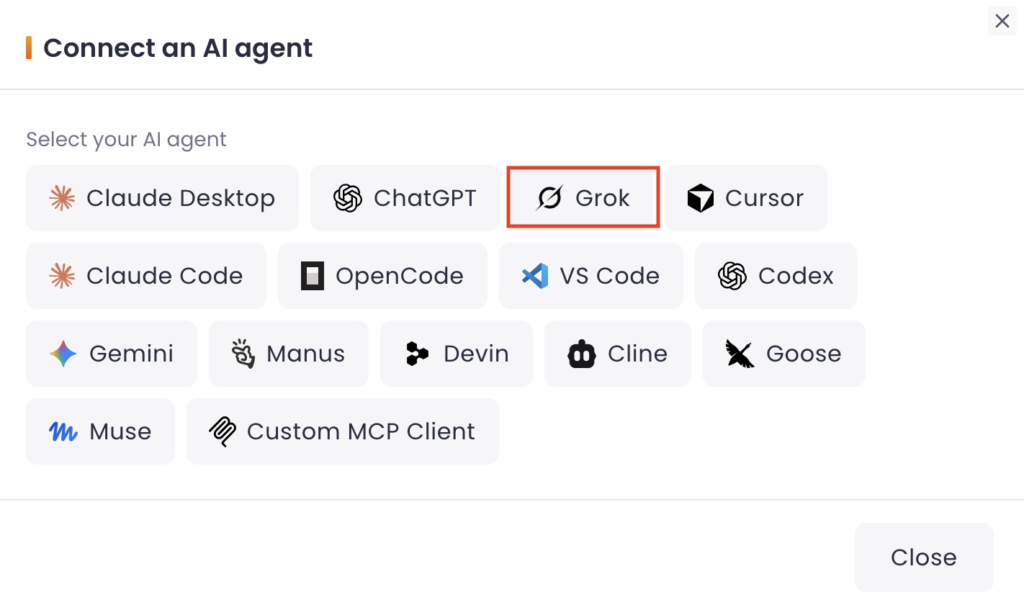
Step 4: Select Grok:
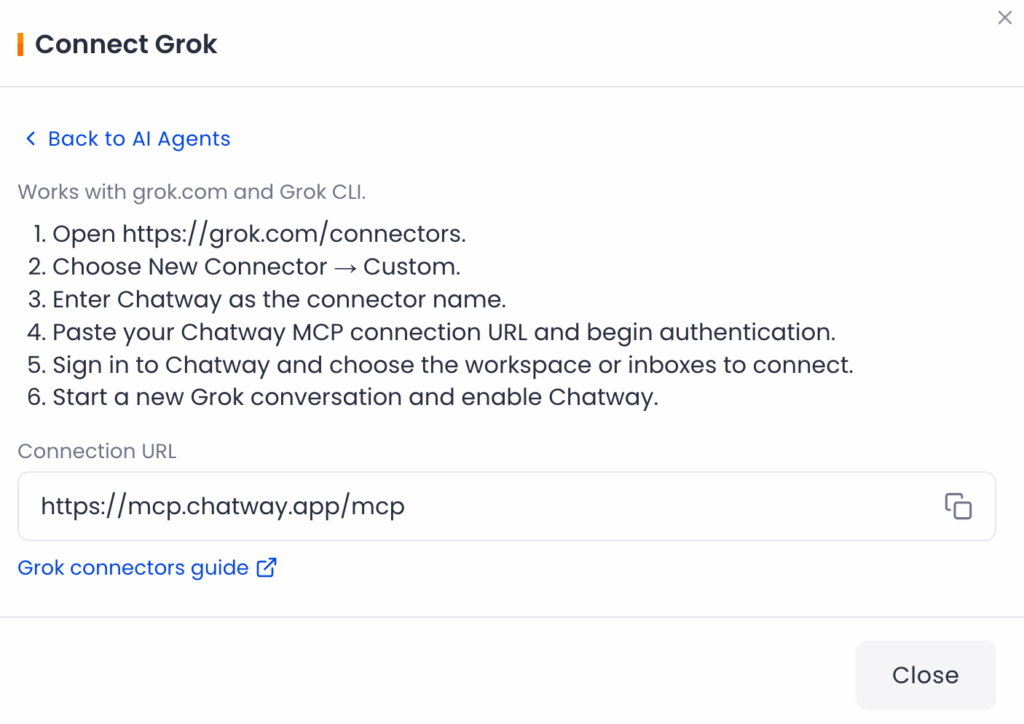
Step 5: Copy the Chatway MCP configuration URL:
Step 6: Now, in Grok, open the plugins page
Step 7: Click on the “New connector” button
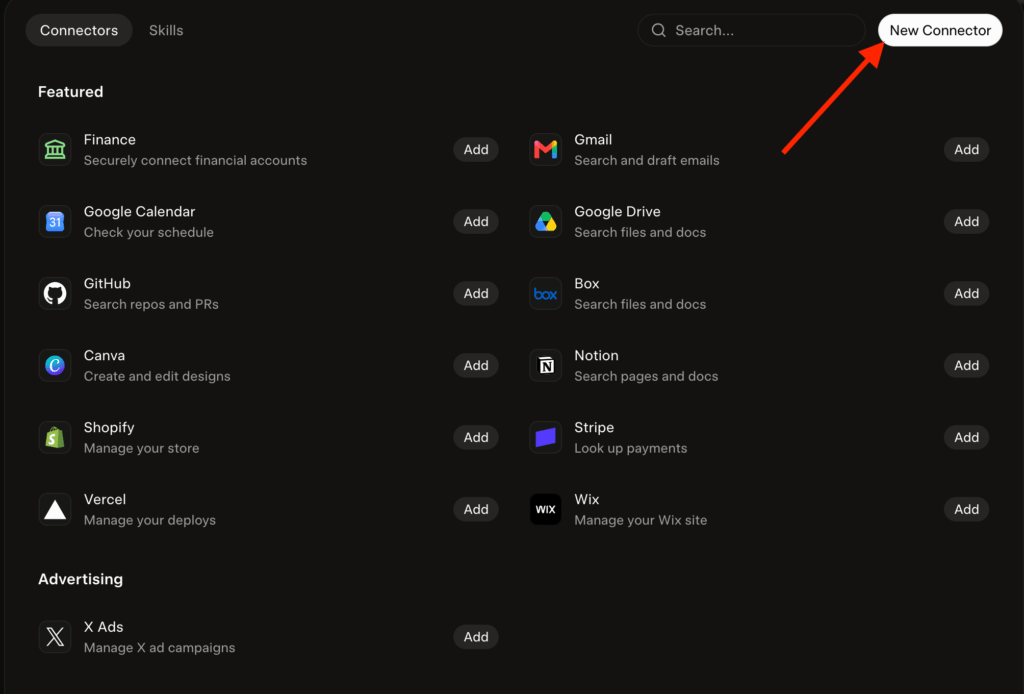
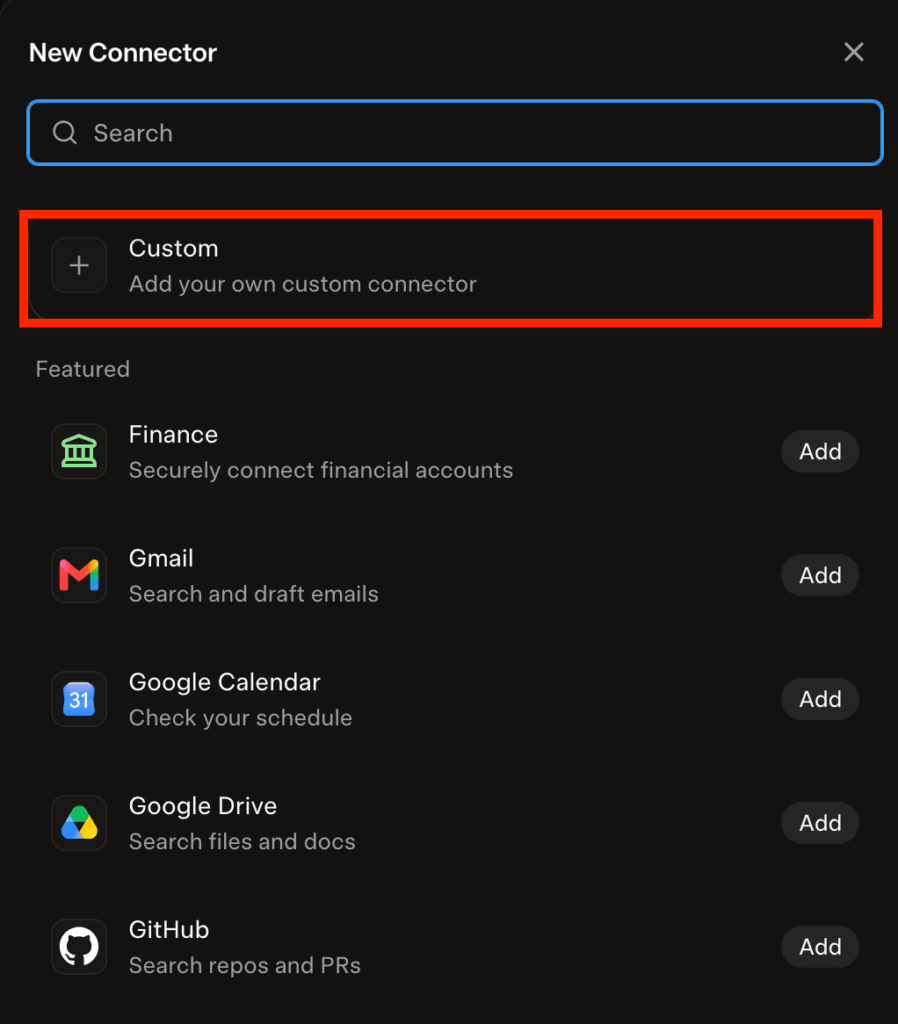
Step 8: Choose the option to add a custom MCP server.
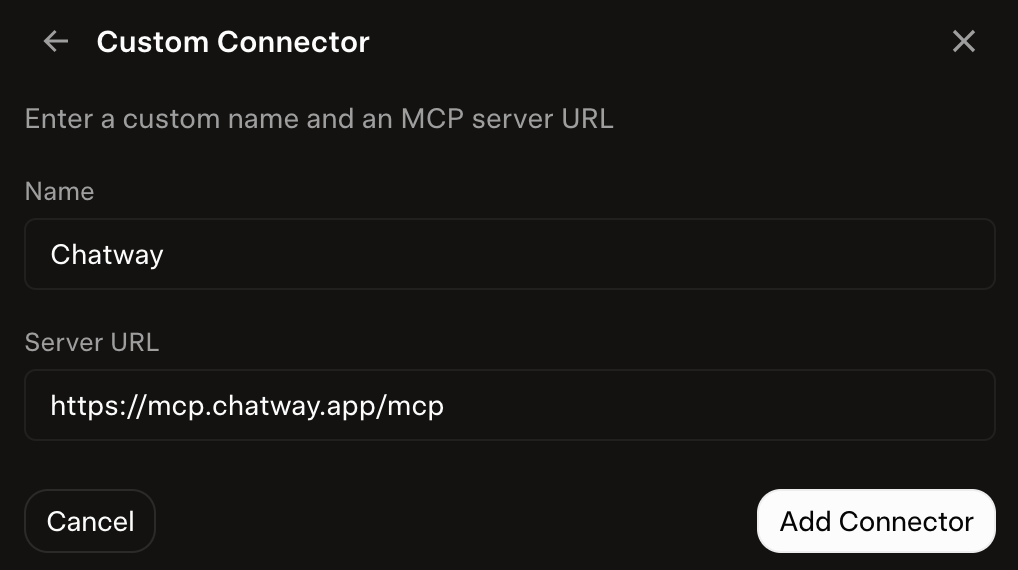
Step 9: Add a name of the connector and the connection URL that you copied from your Chatway dashboard and click on the “Add connector” button to continue.
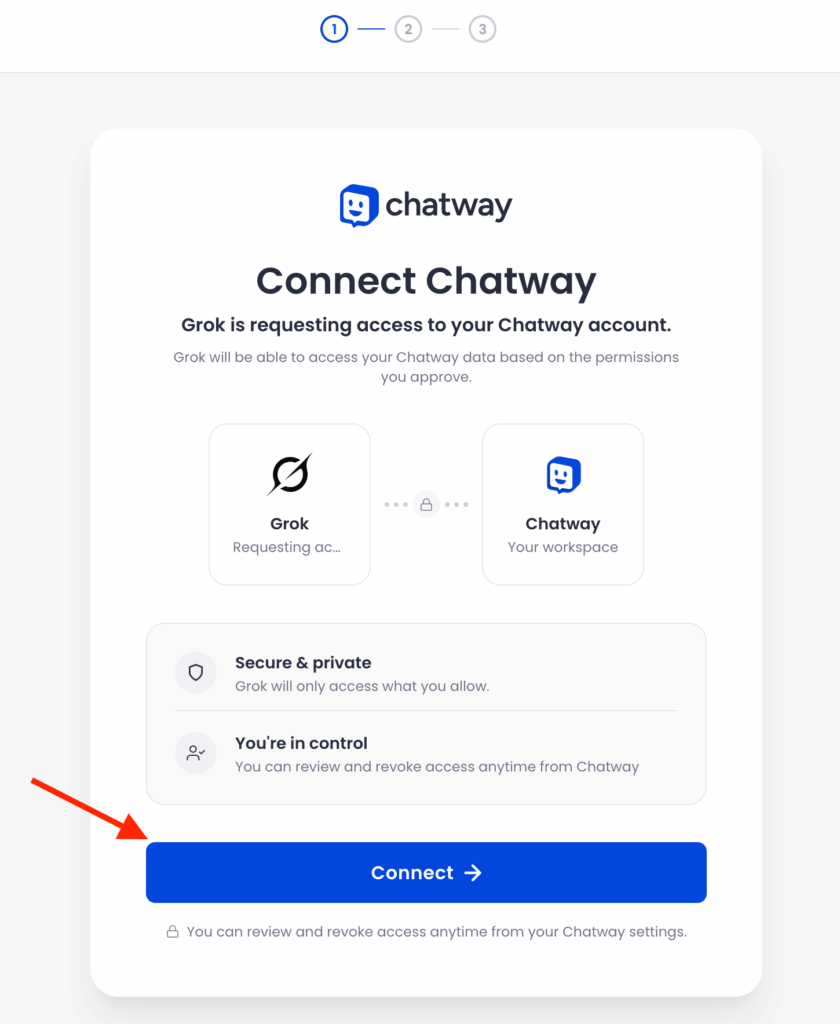
Step 10: Next, you will need to authorize the connection through the popup. Click on the “Connect” button:
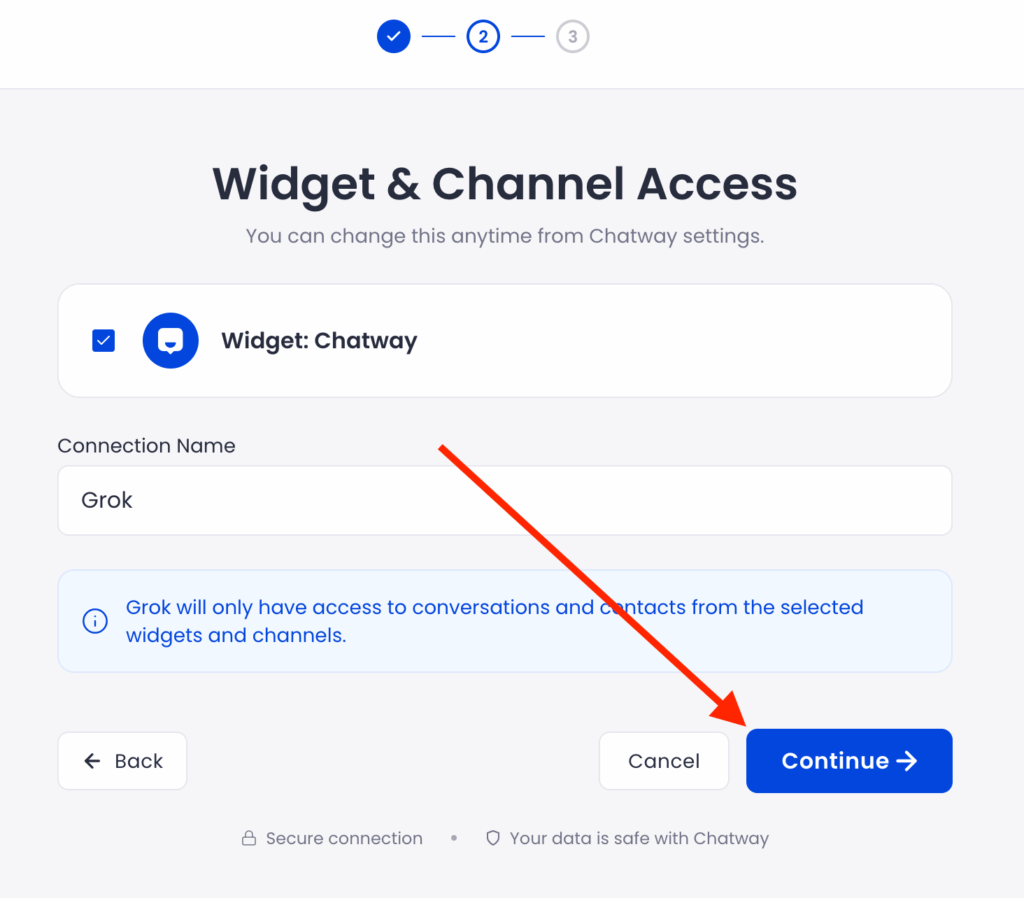
Step 11: Choose your widget, enter a connection name and click “Continue“:
Step 12: Review the permissions that you will give to Grok and click on the “Allow access & continue” button to allow access:
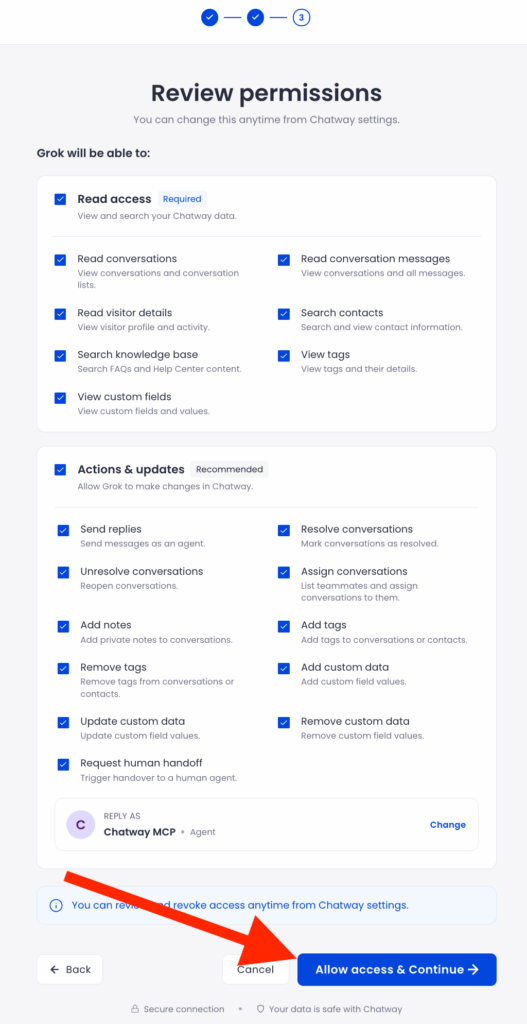
You can review and revoke the access at any time from the Chatway settings.
After the app is created and authorized, it appears under Library page.

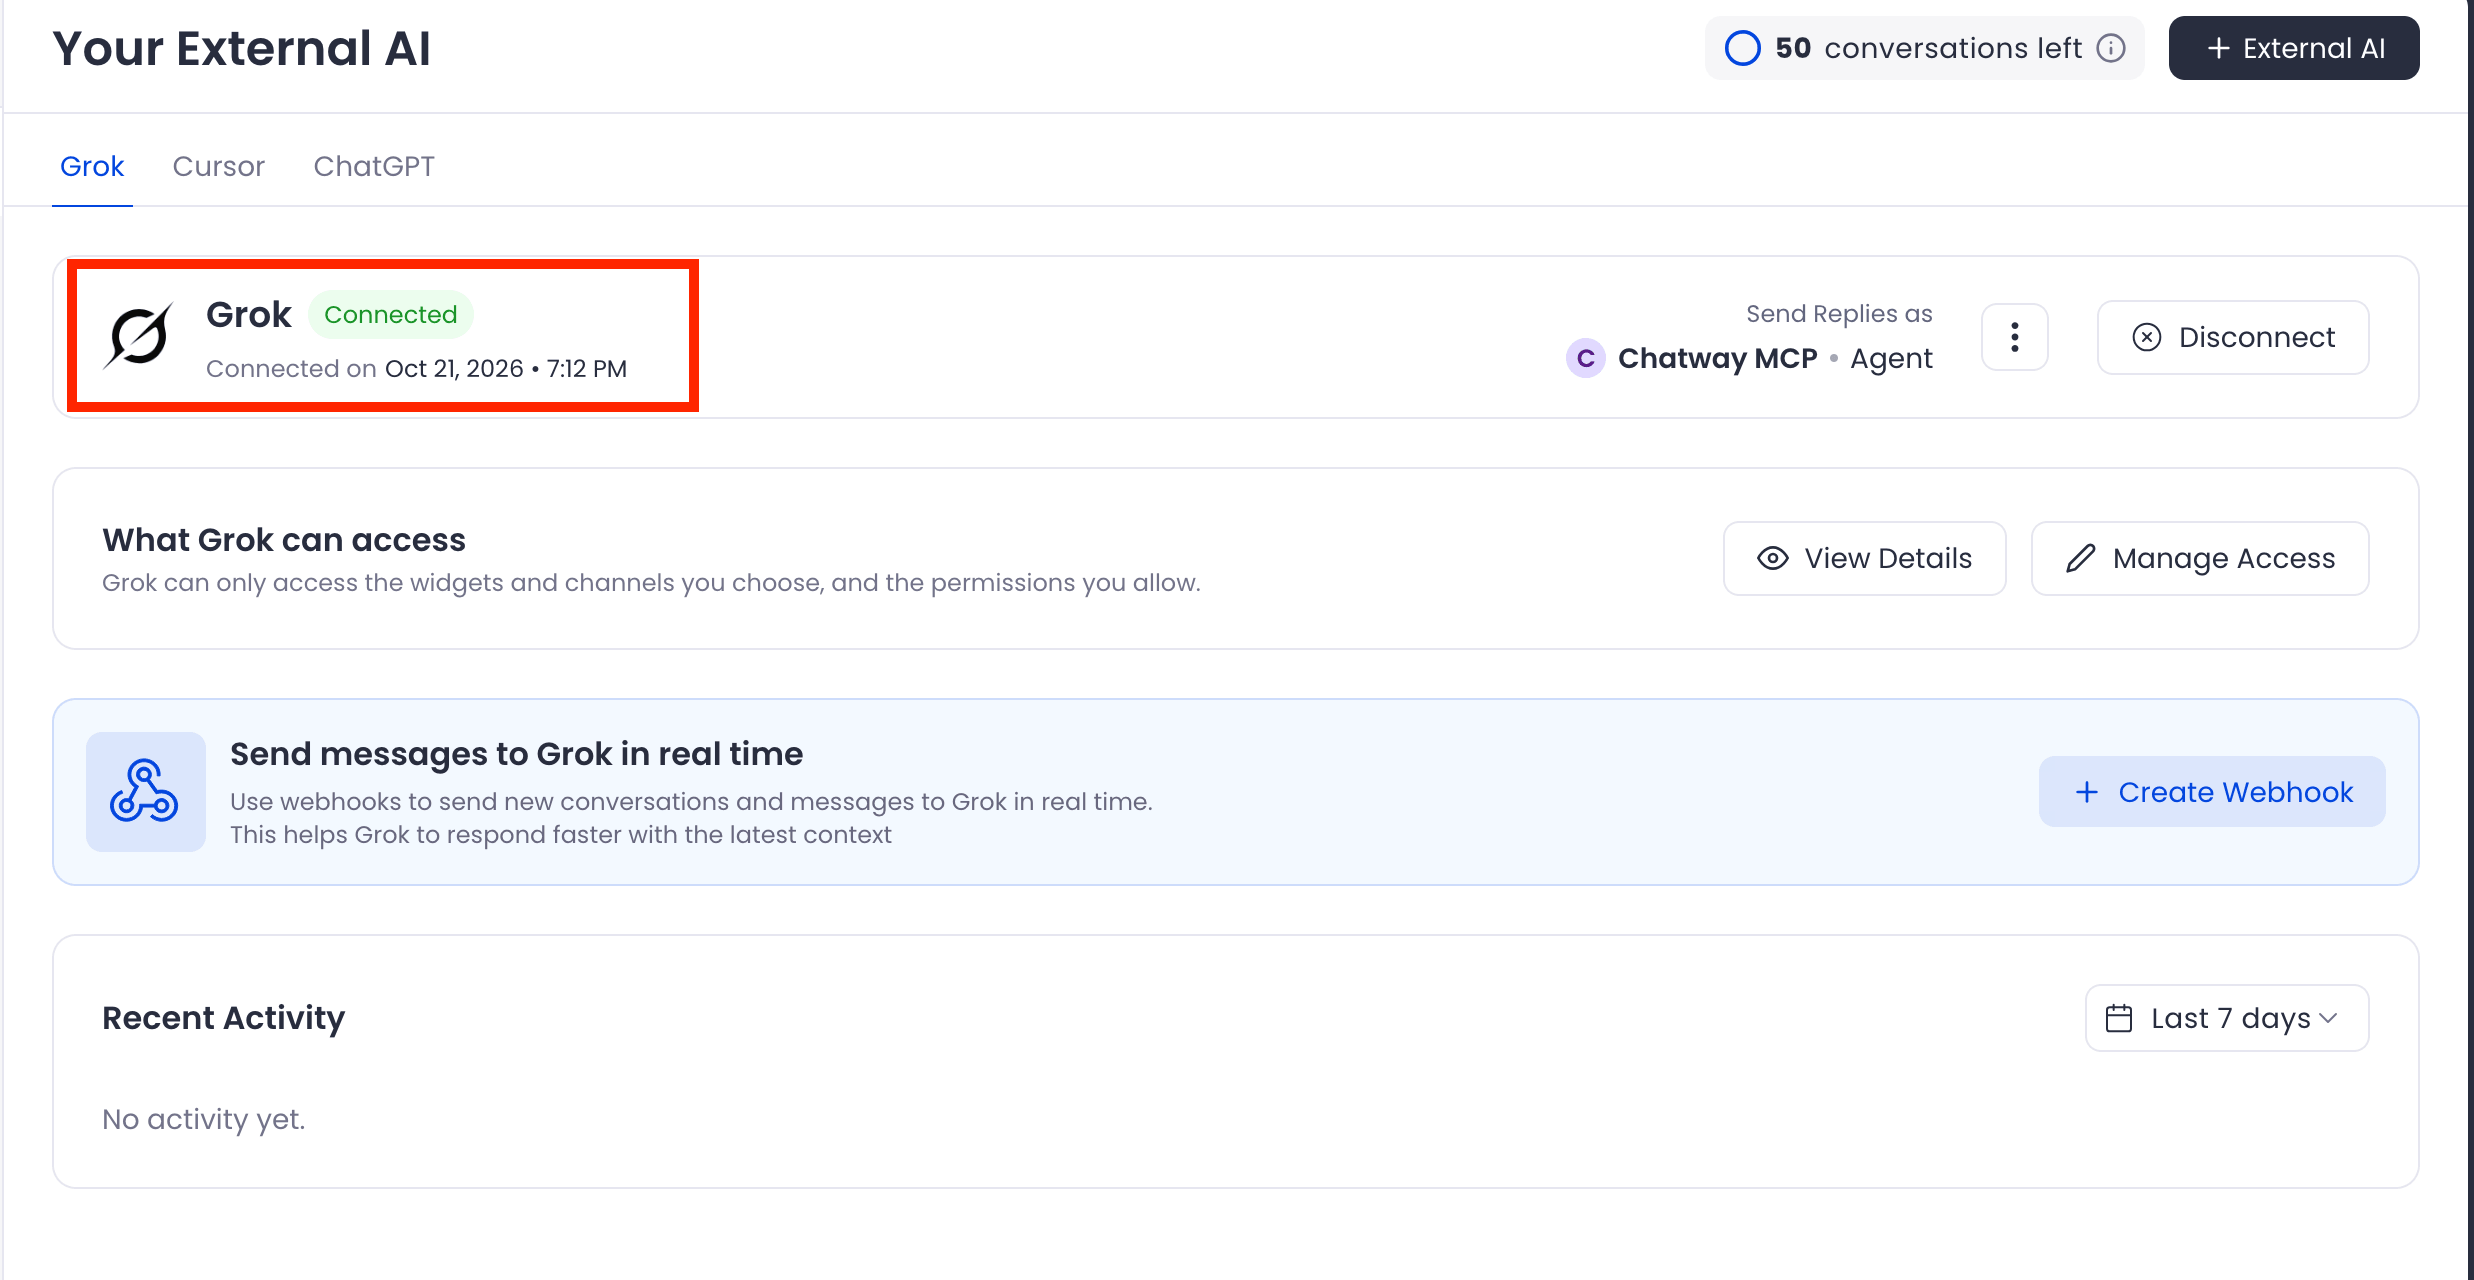
Step 13: Go back to your Chatway AI Agents page, and you will see the successfully connected Grok agent:
Testing your AI agent
Now let’s see how you can use the new connection.
Step 1: Open a new conversation with your Grok agent.
Step 2: Open Grok Agent and enter your request. Grok automatically makes connected MCP tools available in the connectors and can use them when relevant.
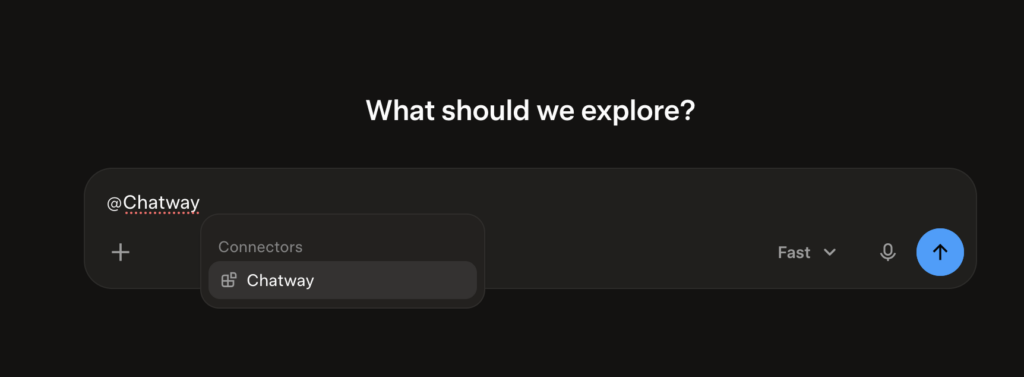
Here’s an example:
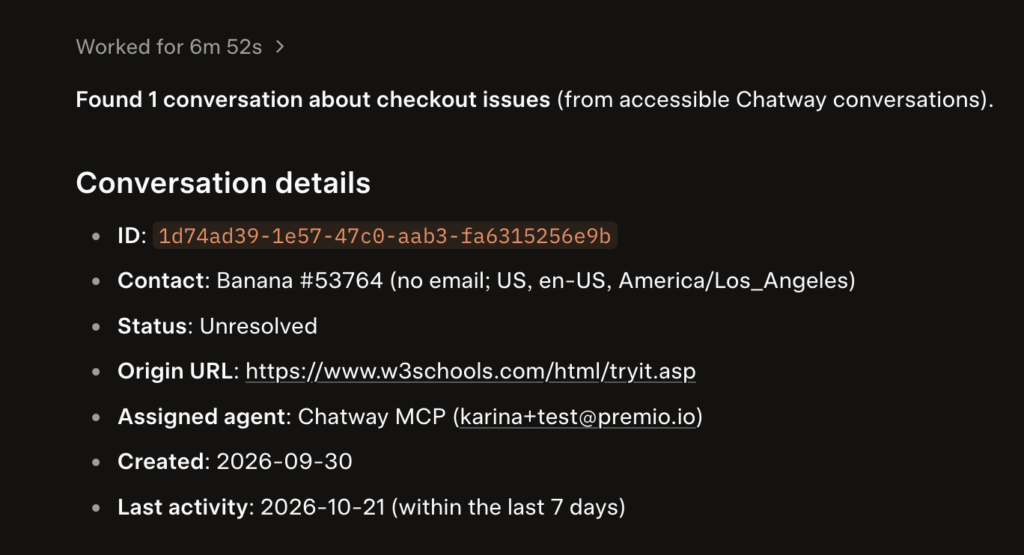
“Find all conversations about checkout issues from the last 7 days.”
Following this example, you may receive the answer below with all relevant data and additional details:
Found 1 conversation about checkout issues (from accessible Chatway conversations).
Conversation details
- ID: 1d74ad39-1e57-47c0-aab3-fa6315256e9b
- Contact: Banana #53764 (no email; US, en-US, America/Los_Angeles)
- Status: Unresolved
- Origin URL: https://www.w3schools.com/html/tryit.asp
- Assigned agent: Chatway MCP ([email protected])
- Created: 2026-09-30
- Last activity: 2026-10-21 (within the last 7 days)
For automatic real-time replies to incoming customer messages, connect Chatway webhooks to your AI agent and use the Chatway API to send responses. Chatway MCP can be used alongside this workflow to access Chatway tools and data.
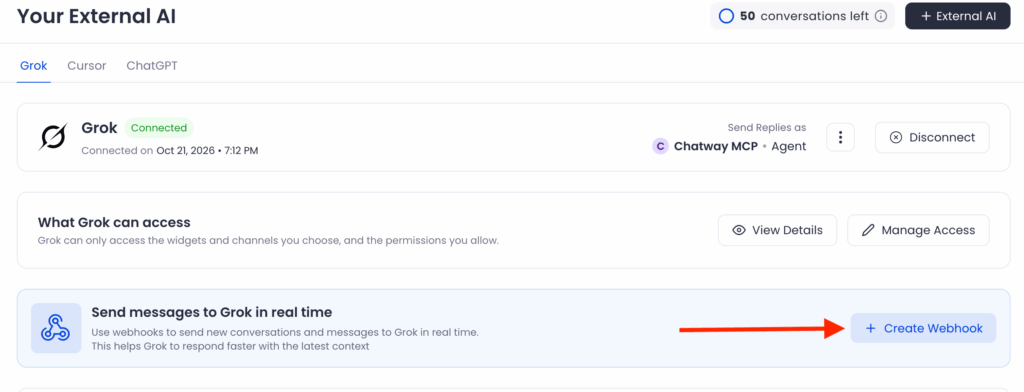
You can check our easy visual guide on how to use the webhooks here: https://chatway.app/help/for-developers/how-to-use-the-chatway-webhooks.
And that’s it! Once connected, you can use Grok to securely access Chatway conversations and contacts, search and summarize support data, and perform supported actions.