


You can connect Codex CLI to Chatway using the Chatway MCP (Model Context Protocol) integration. This allows Codex CLI to access your Chatway conversations, customer information, and support data based on the permissions you give it.
After connecting, you can ask Codex CLI to find and review customer conversations, look up customer details, summarize support activity, and identify recurring issues or customer feedback. Depending on the permissions you give it, Codex CLI can also take actions in Chatway, such as sending replies, assigning or resolving conversations, and adding notes or tags.
For example, you can ask Codex CLI to review conversations from the past week, group them by issue, and highlight the most common problems customers are reporting.
For automatic real-time replies to incoming customer messages, connect Chatway webhooks to your AI agent and use the Chatway API to send responses. Chatway MCP can be used alongside this workflow to access Chatway tools and data.
Chatway’s MCP integration is available on all Chatway plans, including the Free plan.
Requirements
Before you connect Codex CLI to Chatway, ensure you have:
- Codex CLI installed on your device.
- A Chatway account with an Owner or Admin role.
Install and connect the Codex plugin
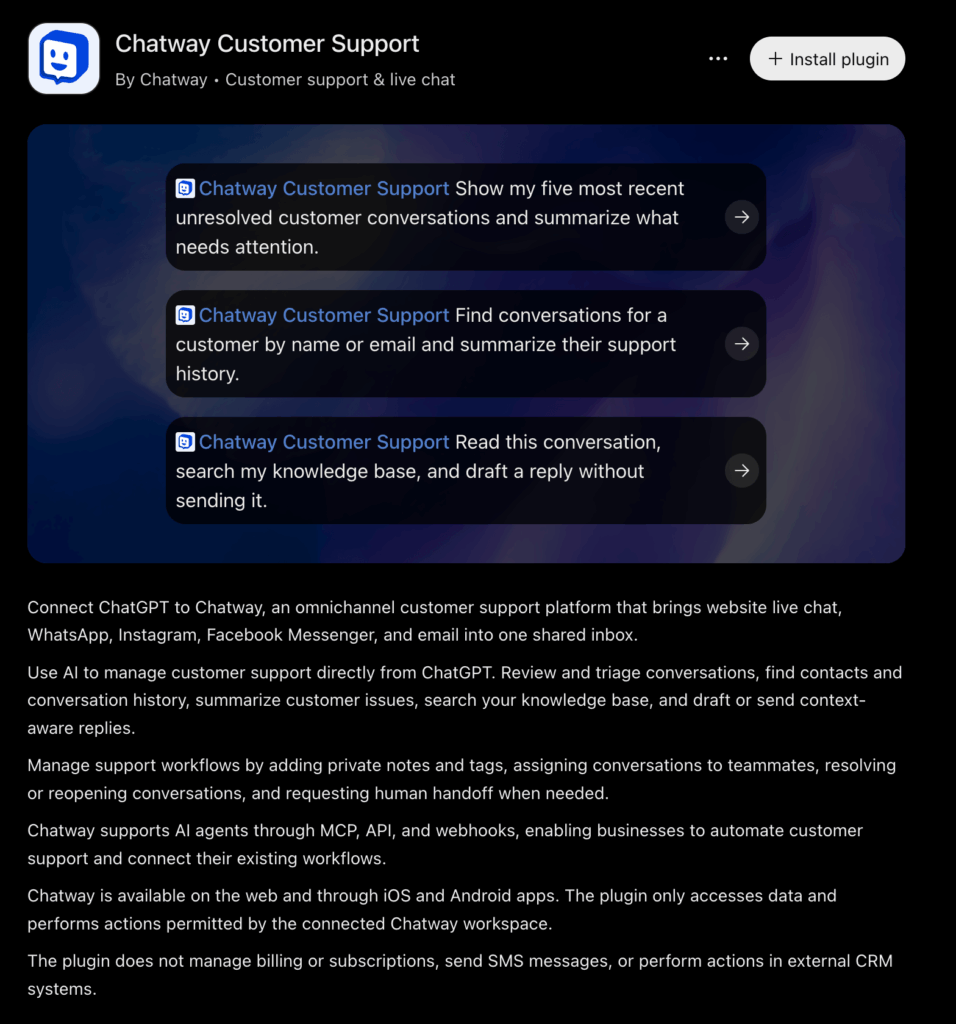
Step 1: Open the Chatway plugin in Codex and click Install plugin.
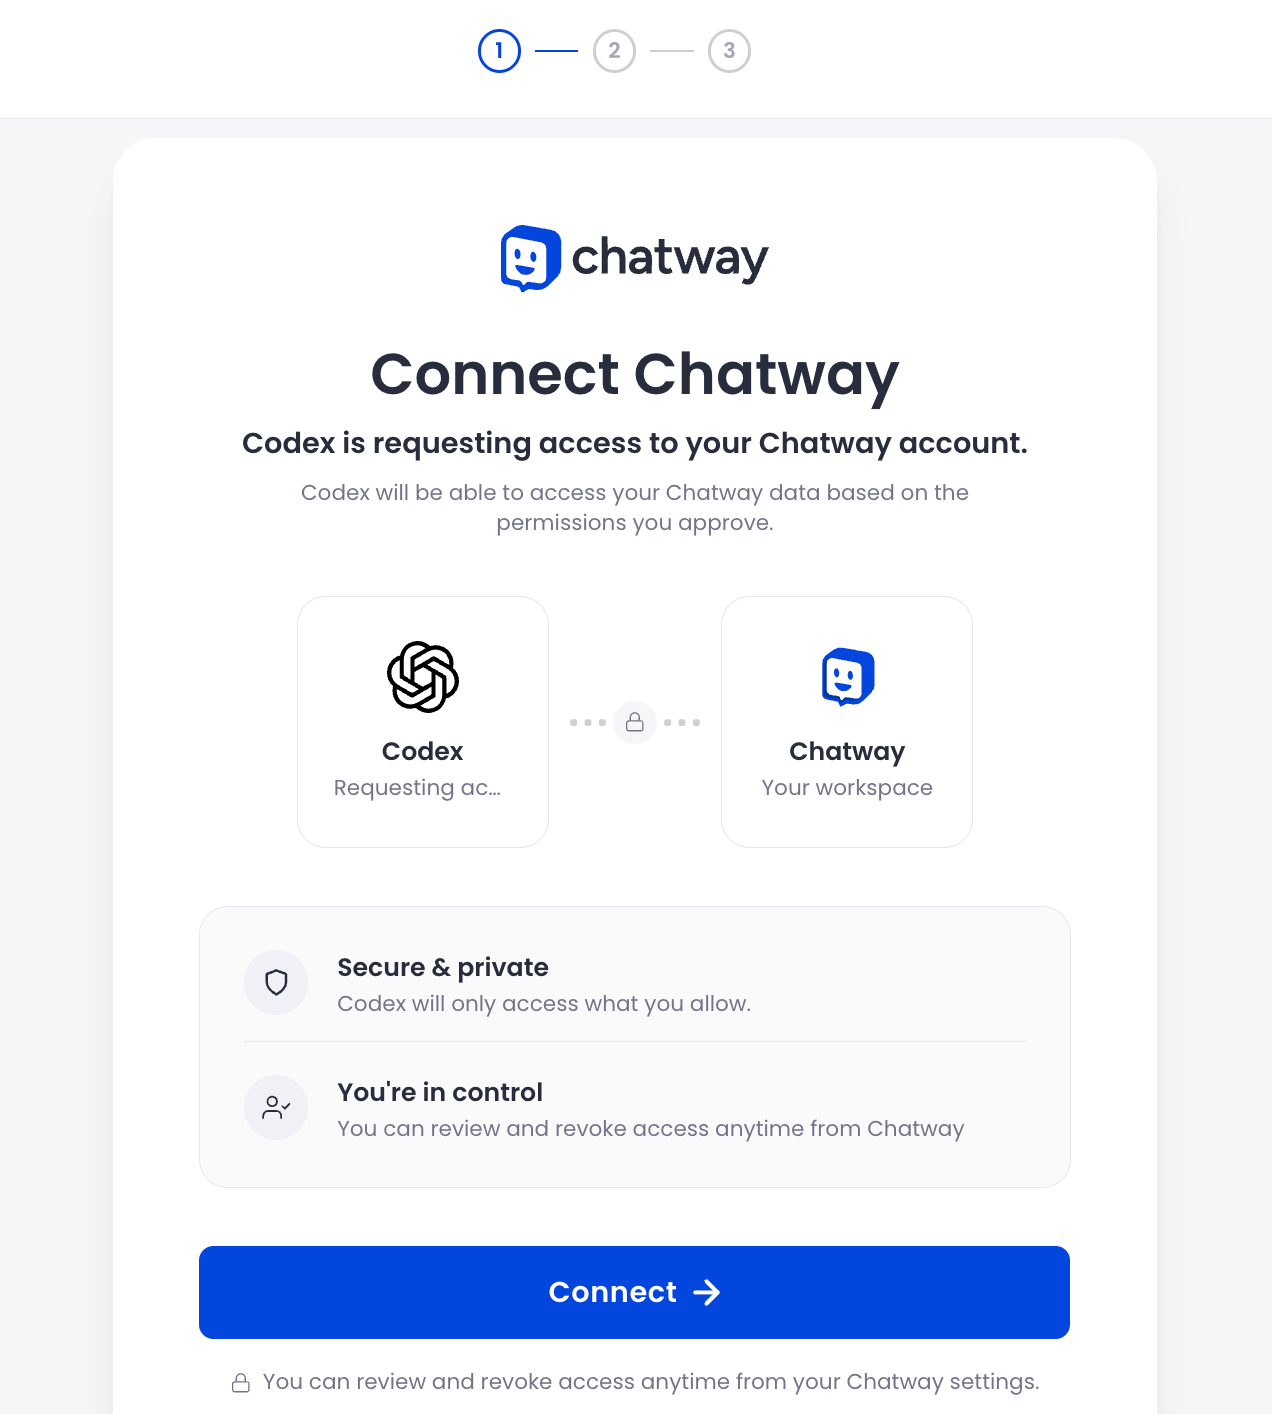
Step 2: Click Connect and sign in to Chatway.
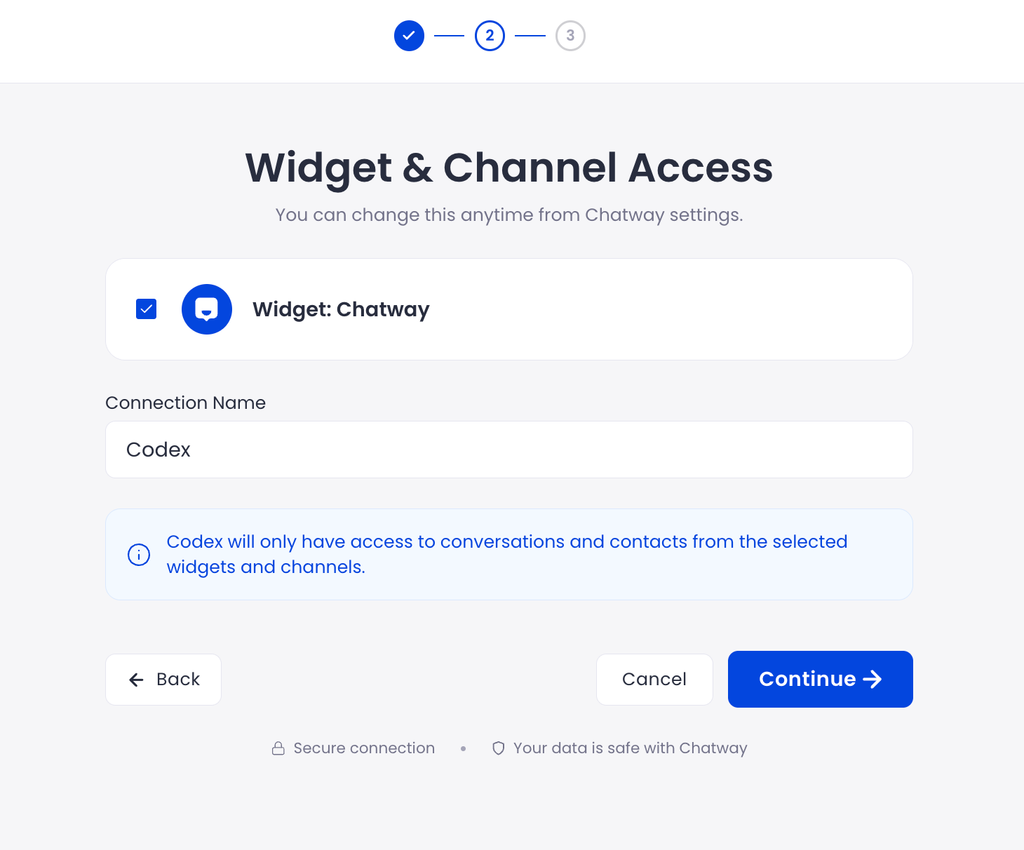
Step 3: Select the inboxes you want Codex to access, and authorize the connection.
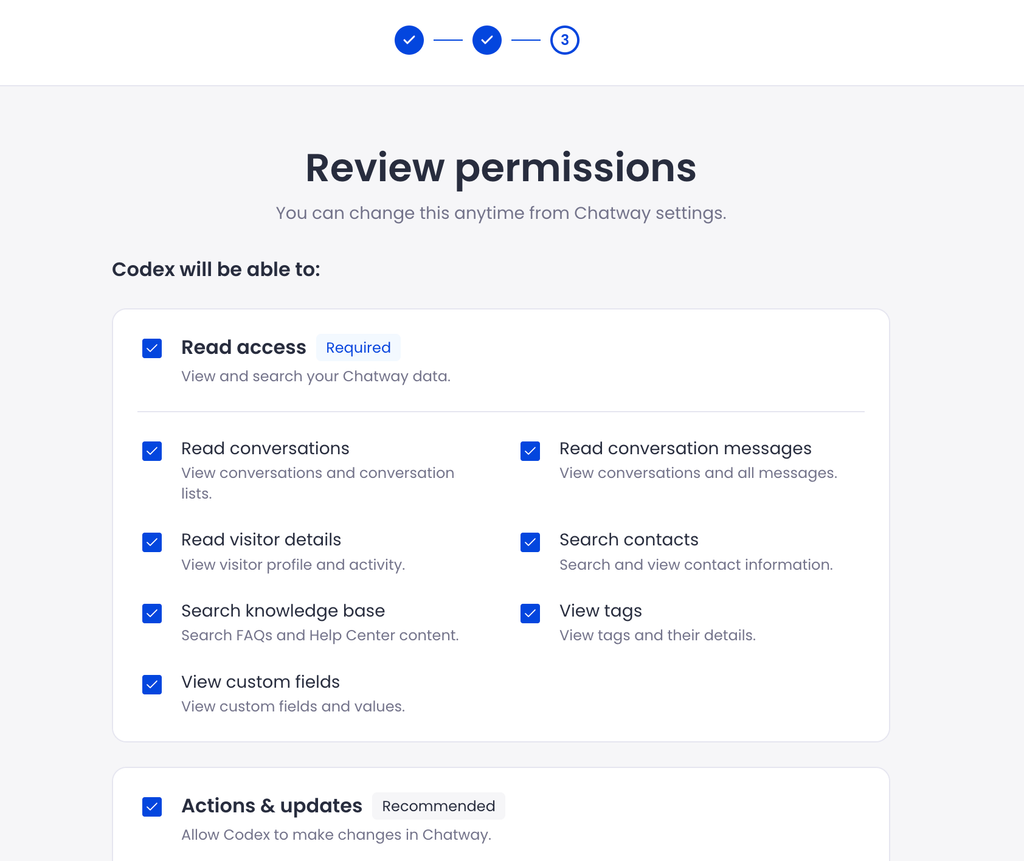
Review the requested permissions before granting access. You can review or revoke access later from your Chatway settings.
That’s it! Chatway is now connected to Codex.
Testing your Chatway connection
Once connected, you can use Codex to search and manage customer conversations.
First, verify what Codex can access without making changes:
List the Chatway tools available to you and summarize which widgets, channels, and actions you can access. Don’t change anything.
For example, try asking:
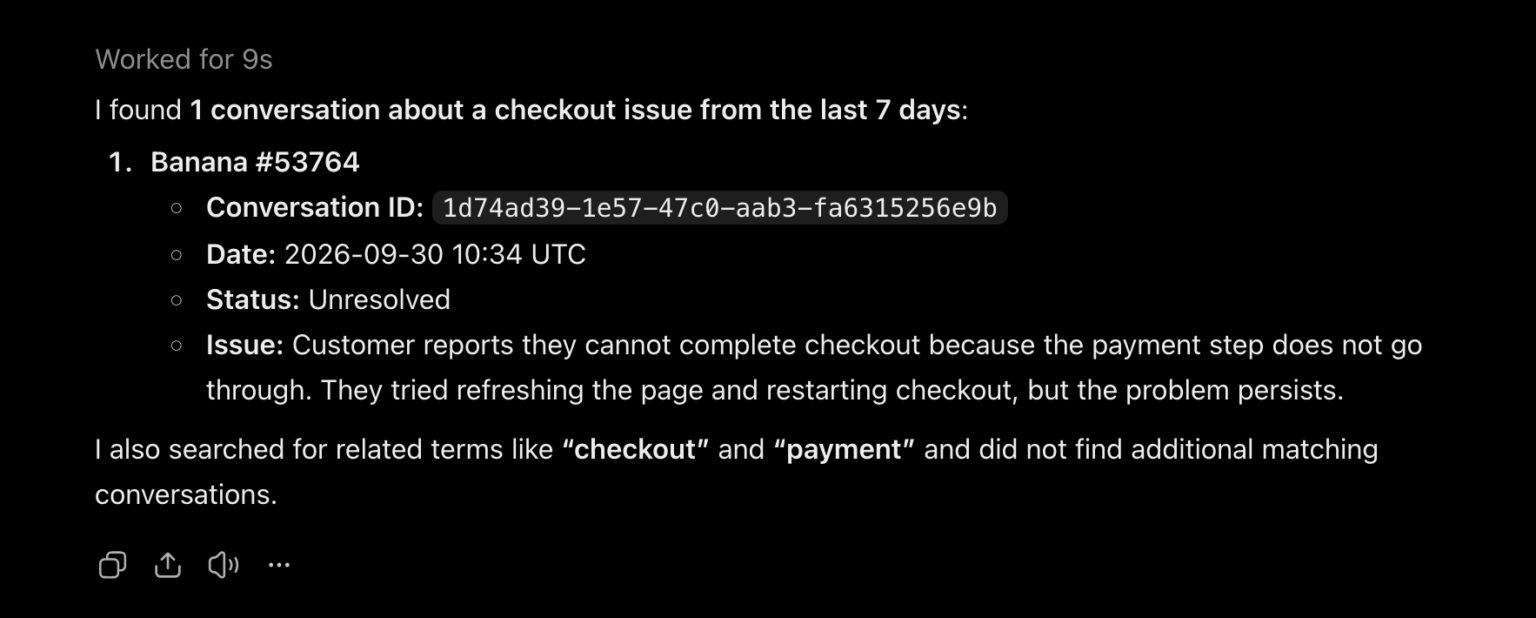
Find all conversations about checkout issues from the last 7 days.
Codex can search your accessible Chatway conversations and return relevant information, including conversation details and customer issues.
You can also try:
Find unanswered customer conversations from today, draft helpful replies, and ask for my approval before sending them.
Advanced: Manual MCP connection (optional)
If you need a custom MCP connection instead of the official Codex plugin, you can still configure Chatway manually.
Obtain the Chatway MCP connection details
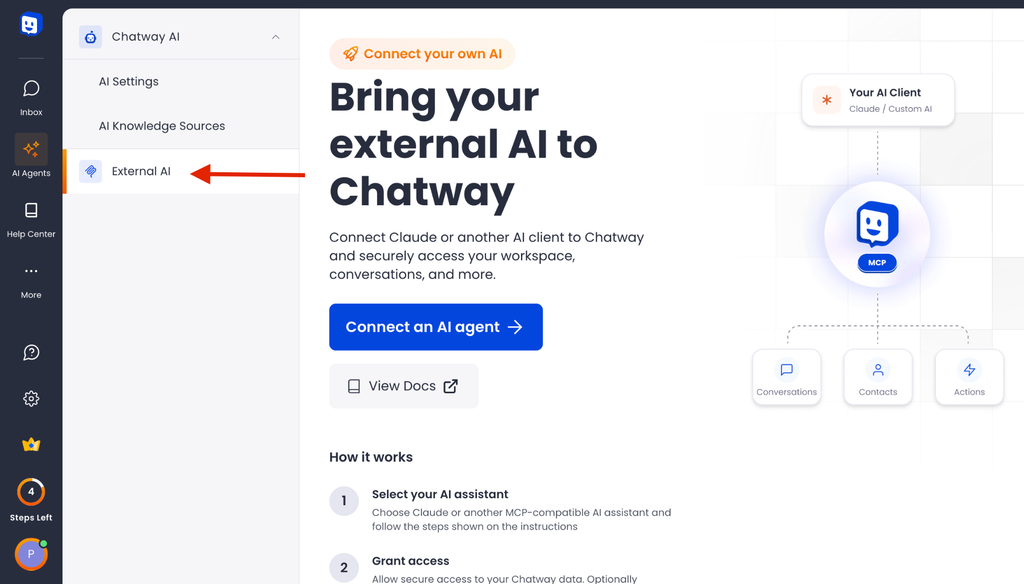
Step 1: From your Chatway dashboard, go to “AI agents” and access the External AI tab or visit https://go.chatway.app/ai-settings.
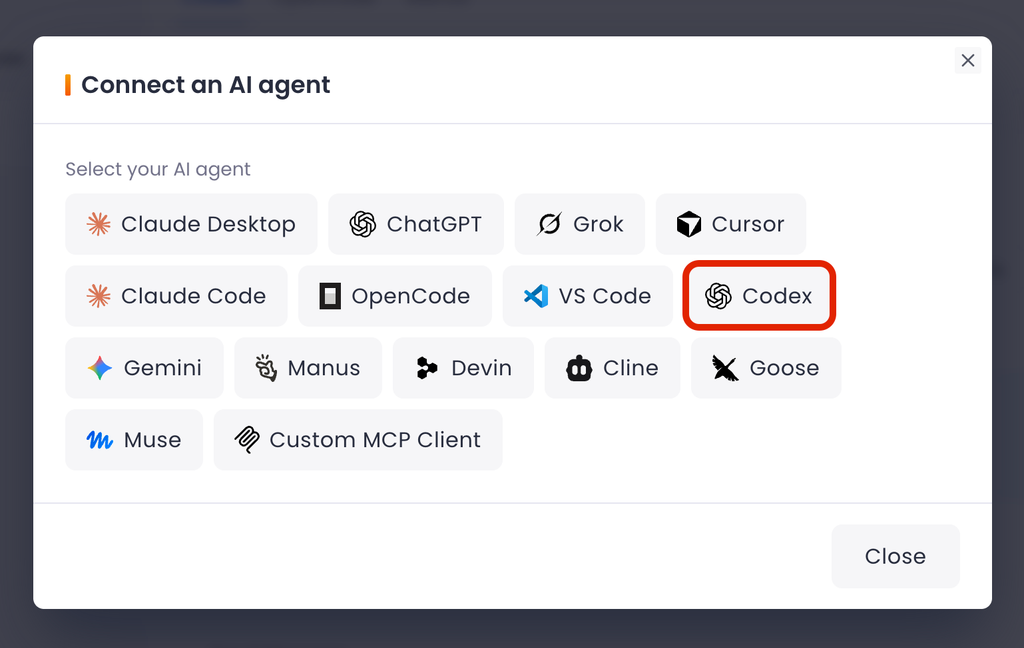
Step 2: Click on the “Connect an AI agent” button and select Codex.
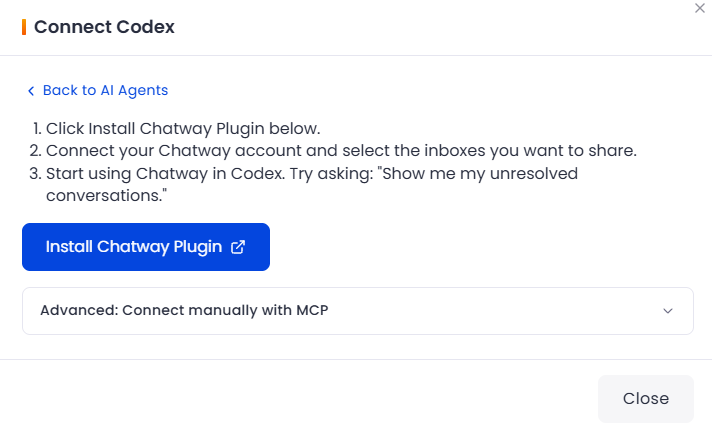
Here, you’ll see the steps for connecting the Chatway MCP server to Codex CLI.
Connecting Chatway to Codex CLI
Follow these steps to add Chatway as an MCP server in Codex CLI.
Step 1: Open your terminal and type the following command. Please ensure that you have Codex CLI already installed.
codex mcp add chatway --url https://mcp.chatway.app/mcpStep 2: Complete the Chatway authorization flow in your browser. If it does not open automatically, run codex mcp login chatway.
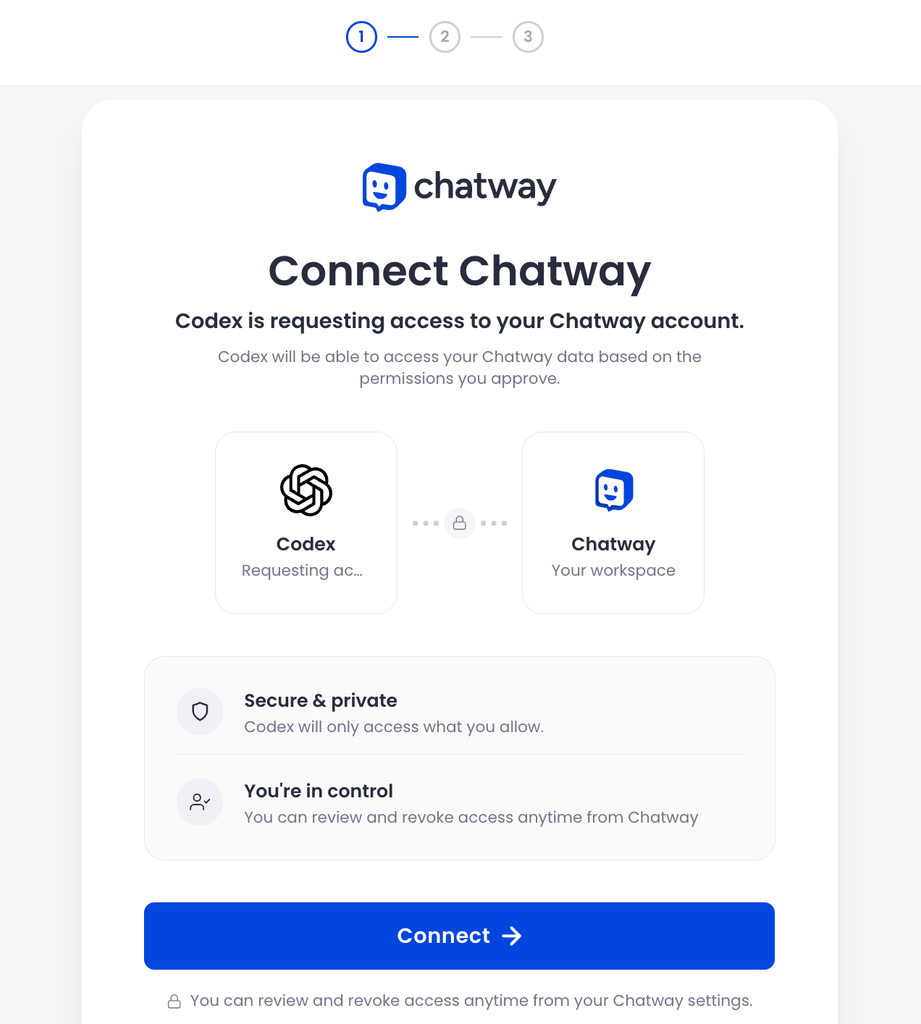
Click “Connect” to continue.
Step 3: You can select the widgets and channels in your Chatway account that you want Codex CLI to access.
Select “Continue”.
Step 4: You can also review the permissions you want to give Codex CLI. You can always edit these later from the “External AI” section in Chatway.
Step 5: After reviewing the permissions, click on the “Allow access & continue” button here.
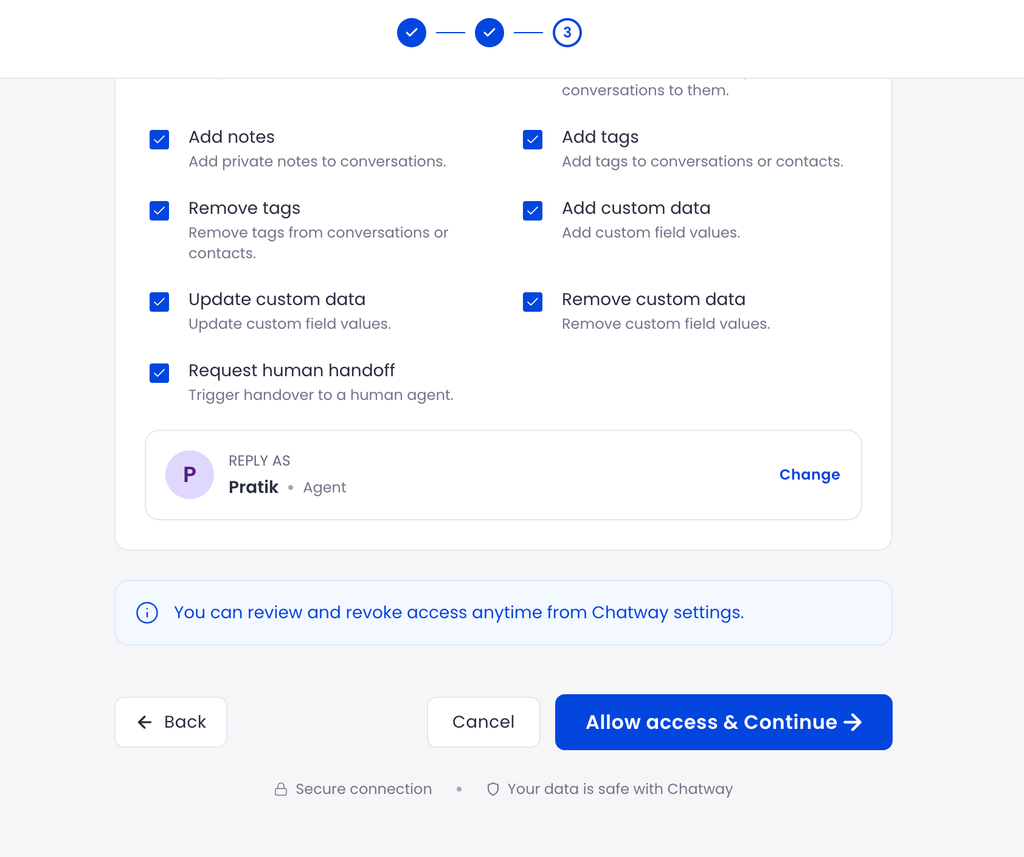
Step 6: Open your terminal and run the following command to check that Chatway has been added:
codex mcp listMake sure Chatway appears in the list of MCP servers.
Step 7: Start Codex CLI by typing codex in your terminal. Then, type “/mcp” in the Codex CLI session to check the MCP connection status.
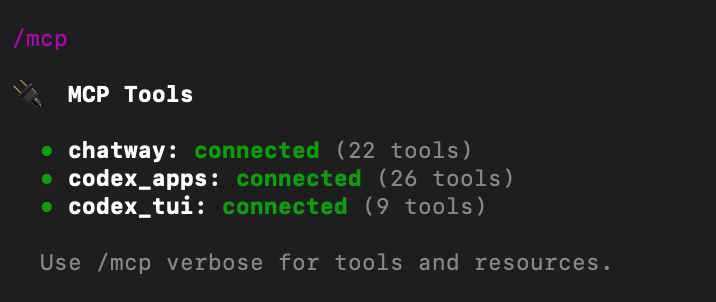
Make sure Chatway appears in the list and check its connection status.
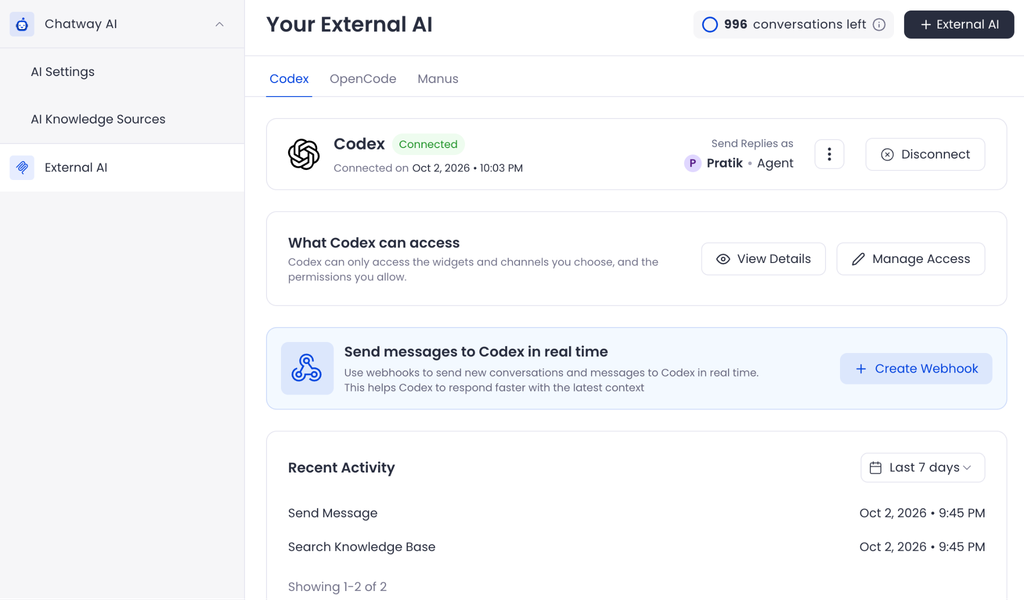
Once connected, this is what the Chatway MCP server connected to Codex CLI looks like in your Chatway dashboard.
Start using Chatway with Codex CLI
Once you connect Codex CLI, you can use it to find information, review conversations, and perform actions in your Chatway workspace.
You can do this by accessing your Codex CLI (typing codex) in your terminal. Here are some examples:
Example 1: In this example, we asked the Codex CLI to find a visitor who asked about the pricing.
Can you please find a visitor in Chatway who inquired about the pricing?
The prompt and results may vary depending on the data in your Chatway account. This is just an example.
Example 2: You can ask Codex CLI to draft a reply to the customer using the information available in Chatway. For example, we used this prompt:
Draft a reply to this customer's pricing question using the available Chatway information. Don't send it yet.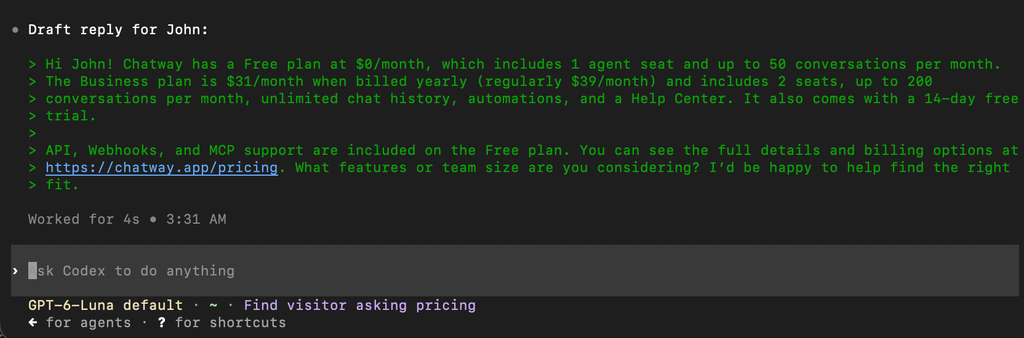
Review the draft to make sure the information is correct. Once you’re happy with it, ask Codex CLI to send that specific reply to the customer.
You can then open the conversation in your Chatway inbox to check that the reply was sent successfully.
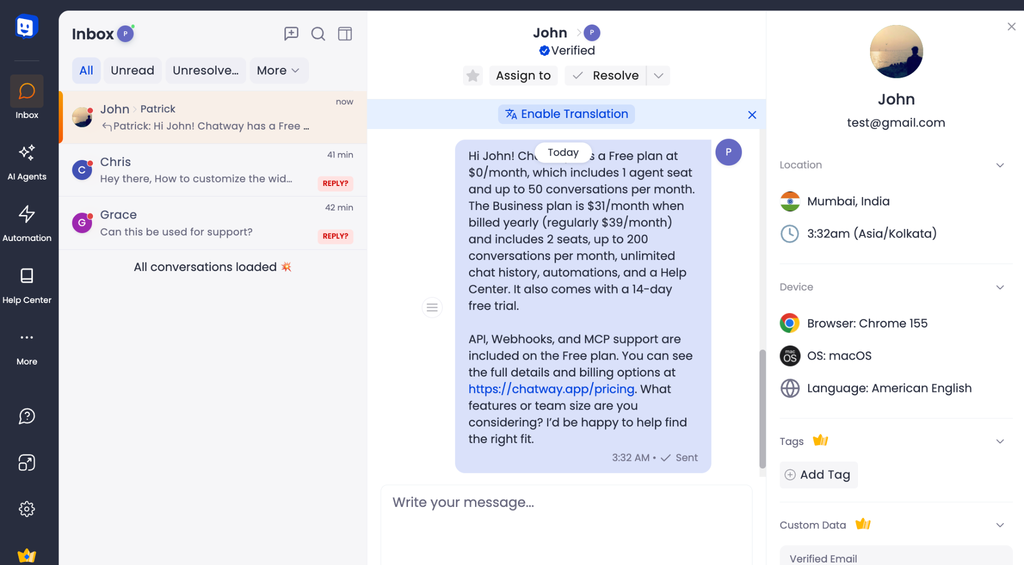
Note: Replies sent through Codex CLI use the sender identity configured in Chatway’s External AI settings. Check the “Send Replies as” setting to see which identity will appear to the customer.
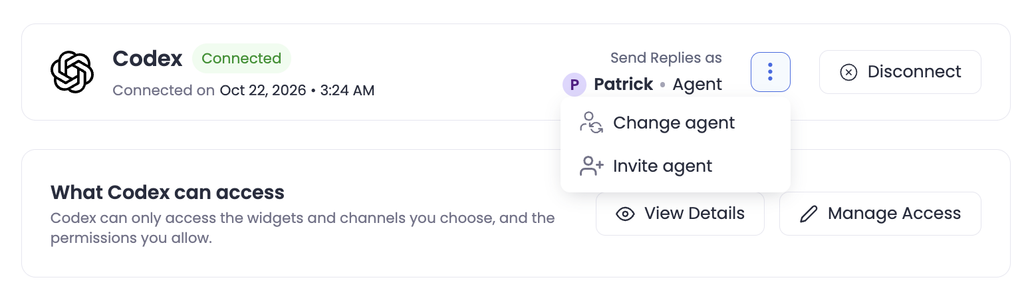
The “External AI” section in Chatway will show you all the recent actions performed through Codex CLI.
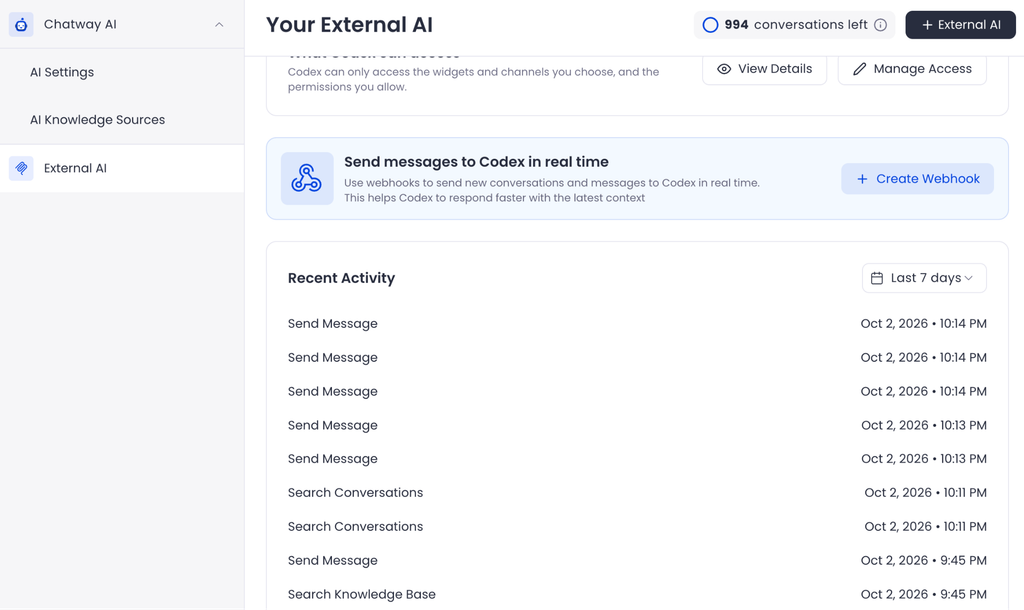
Here, you can disconnect your external AI. You can always manage the read and write access of the Chatway MCP server connected to Codex CLI from the “Manage Access” section.
You can also use webhooks to let Chatway send conversation events to your AI agent in real time.
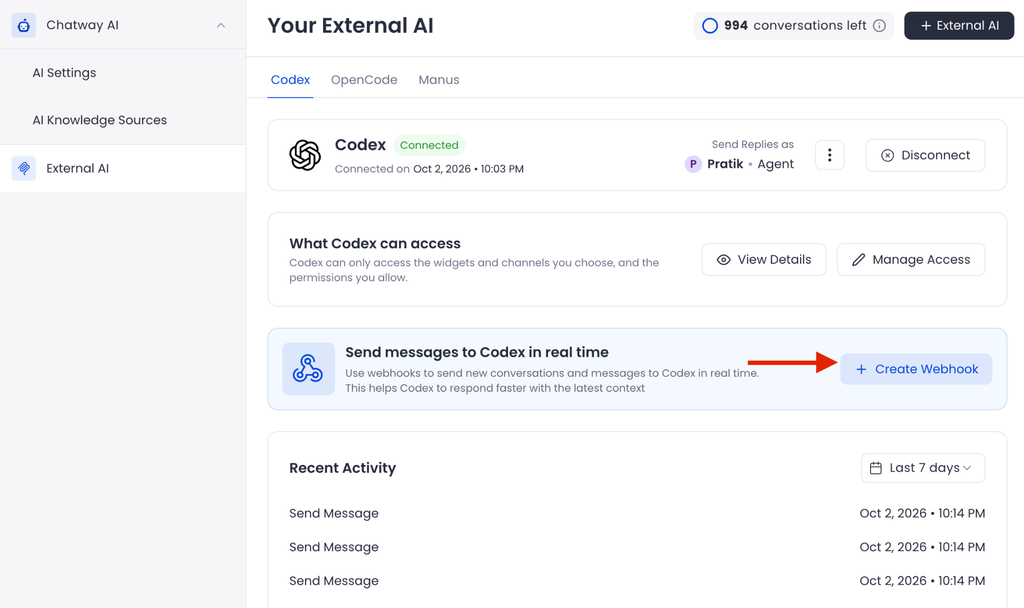
To learn how to set up webhooks in Chatway, you can check the following guide here.